Internal Parcel Management for Freight Forwarders


Freight forwarding operations coordinate shipments across countries and transport networks. While carrier tracking shows how shipments move between cities or ports, teams still need visibility when freight moves between their own warehouses.
In many forwarding networks, shipments arrive at one facility, are processed, and then dispatched to another warehouse closer to the final destination. Without a structured system, teams often rely on spreadsheets, email updates, or verbal confirmation to track these transfers.
This can create uncertainty about what shipments are currently in transit between warehouses, when they are expected to arrive, and whether all items from a dispatch were successfully received.
Parcel Tracker helps forwarding teams maintain visibility across their warehouse network. Shipments can be logged when they arrive at the origin facility, transferred to another warehouse, and reconciled when they reach the destination. This creates a clear operational record from the moment freight enters your network until it is delivered or collected.
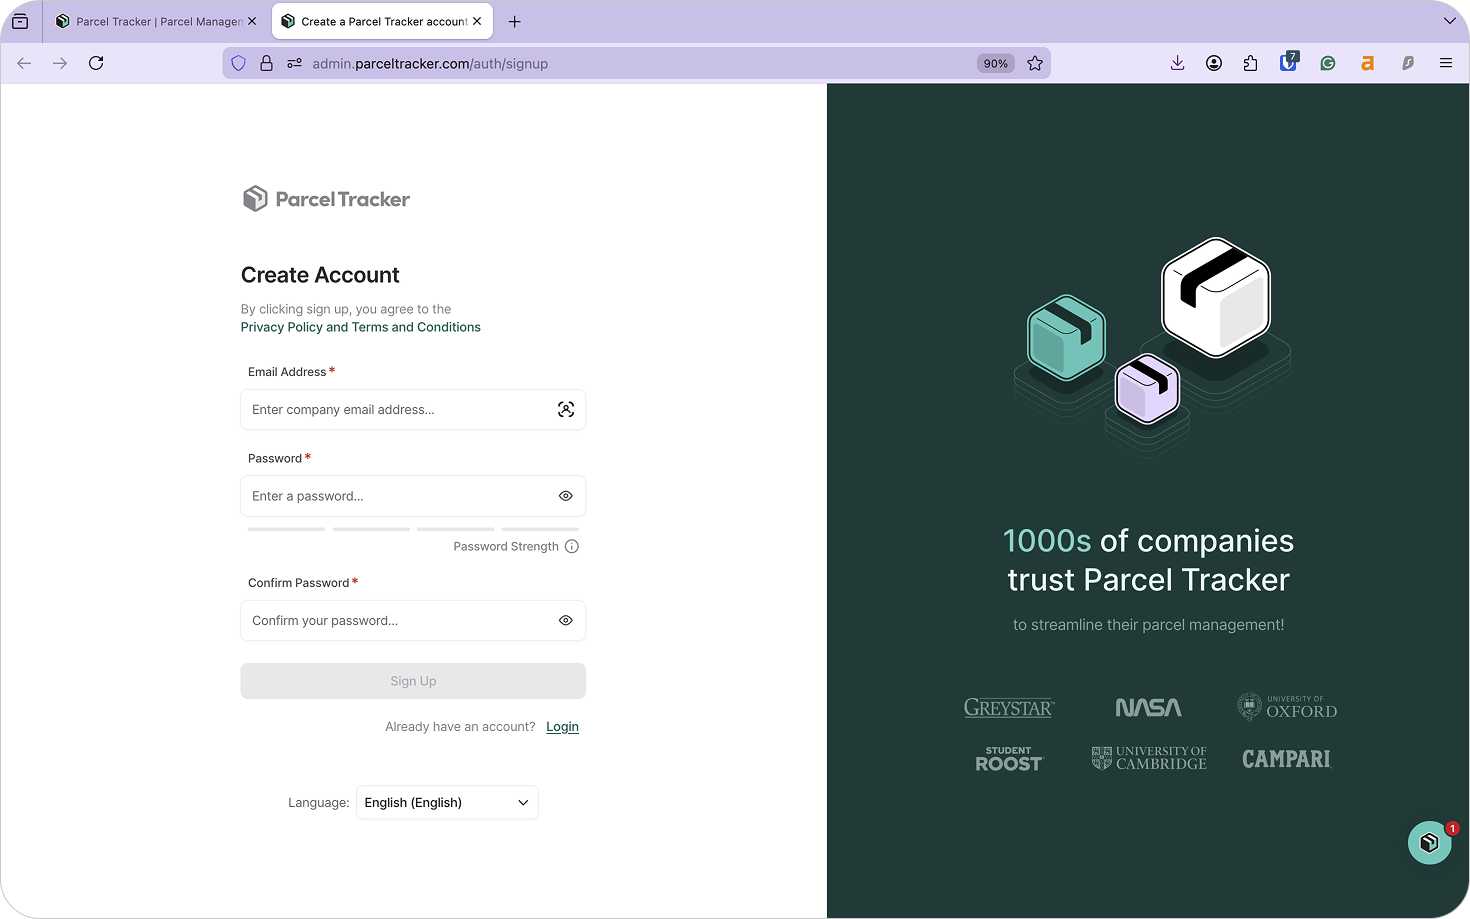
1. Create a Parcel Tracker Account
Go to parceltracker.com and select Sign Up for Free to create your account. Once logged in, open Settings in the lower left-hand corner to add your company logo and address.
Next, navigate to Settings → Features and enable Additional Parcel Details.
This allows your team to:
- Add shipment tags
- Assign storage locations
- Capture a clear photo of shipments at intake

In freight forwarding environments, shipments may be handled by multiple teams across different stages of the workflow. Capturing detailed information at intake helps maintain visibility and accountability throughout the handling process.
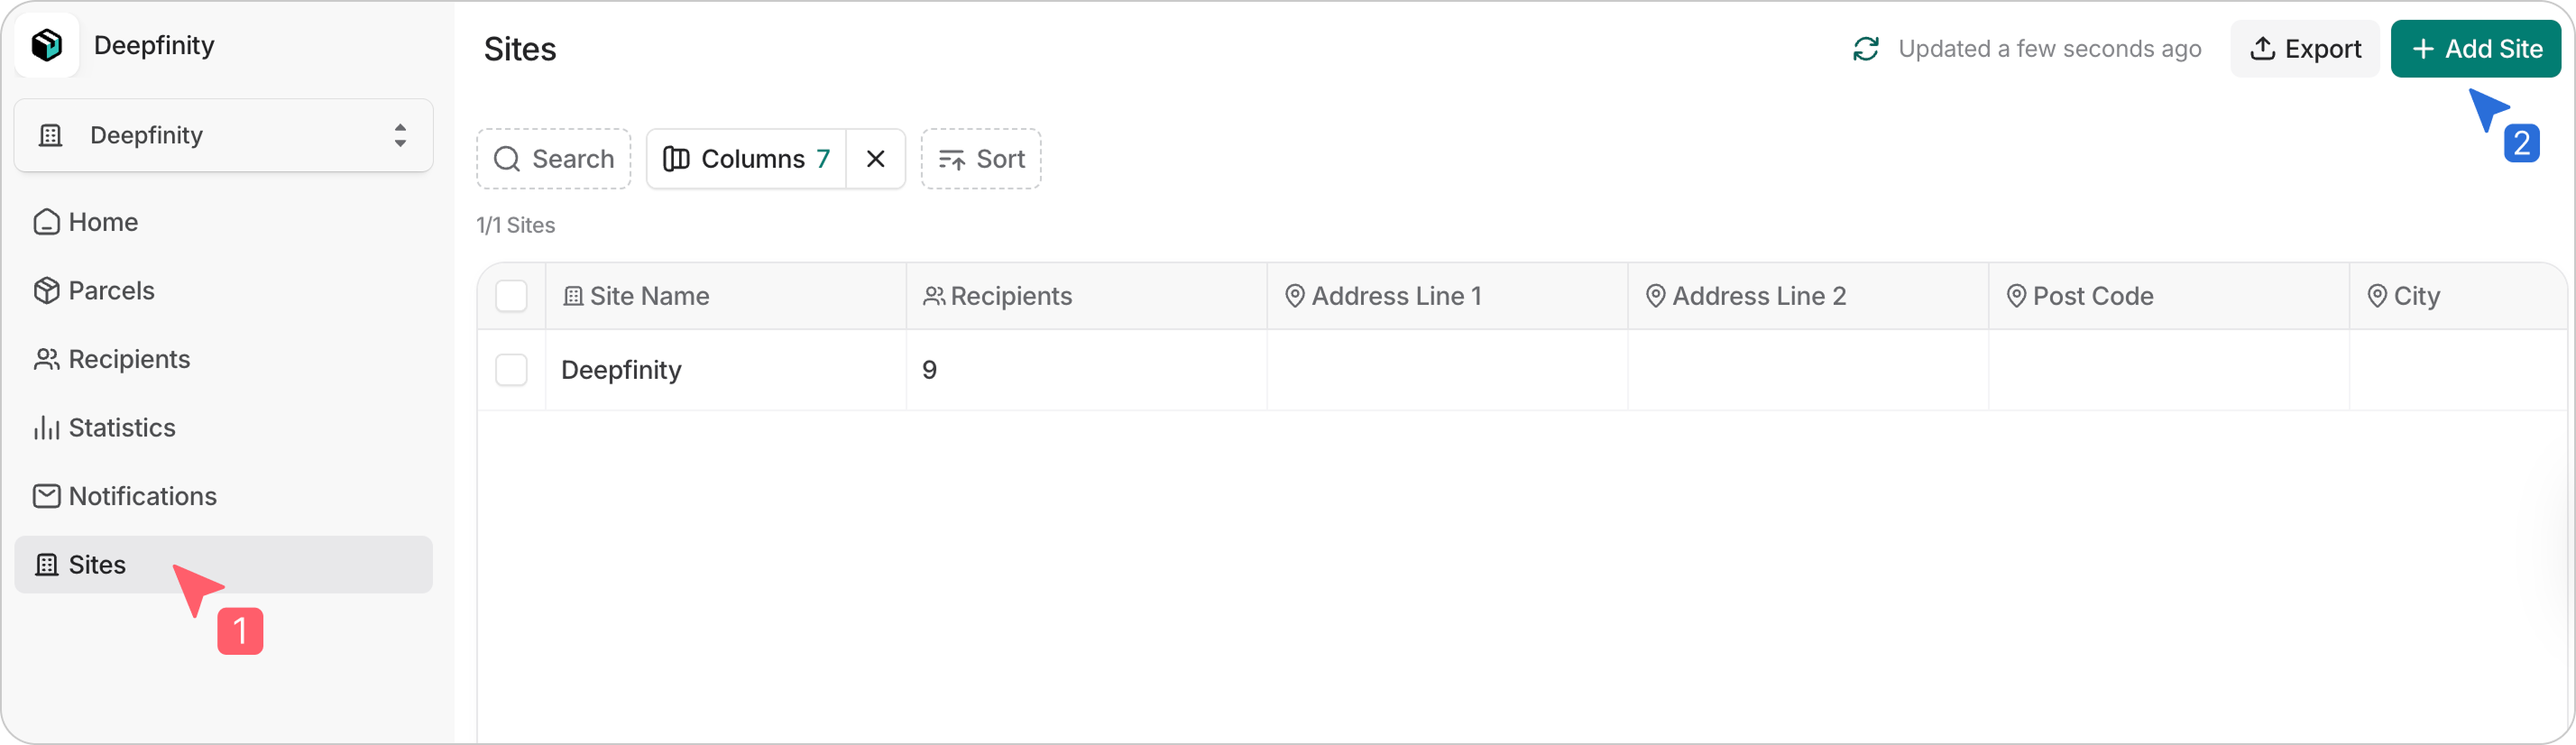
2. Add Sites
Sites represent the different warehouses or facilities within your freight forwarding network. For forwarding operations, sites typically represent separate facilities in different cities or countries.
Examples include:
- Origin Warehouse (export facility)
- Regional Consolidation Warehouse
- Destination Warehouse (import facility)
- Customer Pickup Warehouse
By setting each warehouse up as a site, Parcel Tracker mirrors how shipments move across your forwarding network. When shipments are dispatched from one warehouse to another, the destination warehouse can see which shipments are on the way before they arrive.
To add a site, click Sites in the dashboard, and select Add Site. Enter the name and any optional details.
3. Upload Your Recipient List
Before scanning shipments, upload your recipient list. Parcel Tracker uses this list to match shipments automatically and send notifications when shipments are logged or ready for collection. Without a recipient list, shipments must be processed manually, which can slow intake and increase the risk of mismatches.
A freight forwarding recipient list should include:
- First name
- Last name
- Email address
- Location (destination country, customer company, or delivery region)
- Site: the destination facility where shipments will arrive
- Additional site: the intake facility where shipments first arrive
- Drop-off location: the final delivery point if internal couriers are used
Drop-off locations are particularly useful when internal drivers deliver shipments to customers after they arrive at the destination warehouse. Parcel Tracker organizes shipments by drop-off location to help drivers route deliveries efficiently.
To upload your CSV:
- Select Recipients
- Choose Import List
- Confirm permission and select Continue
- Map fields and review before completing
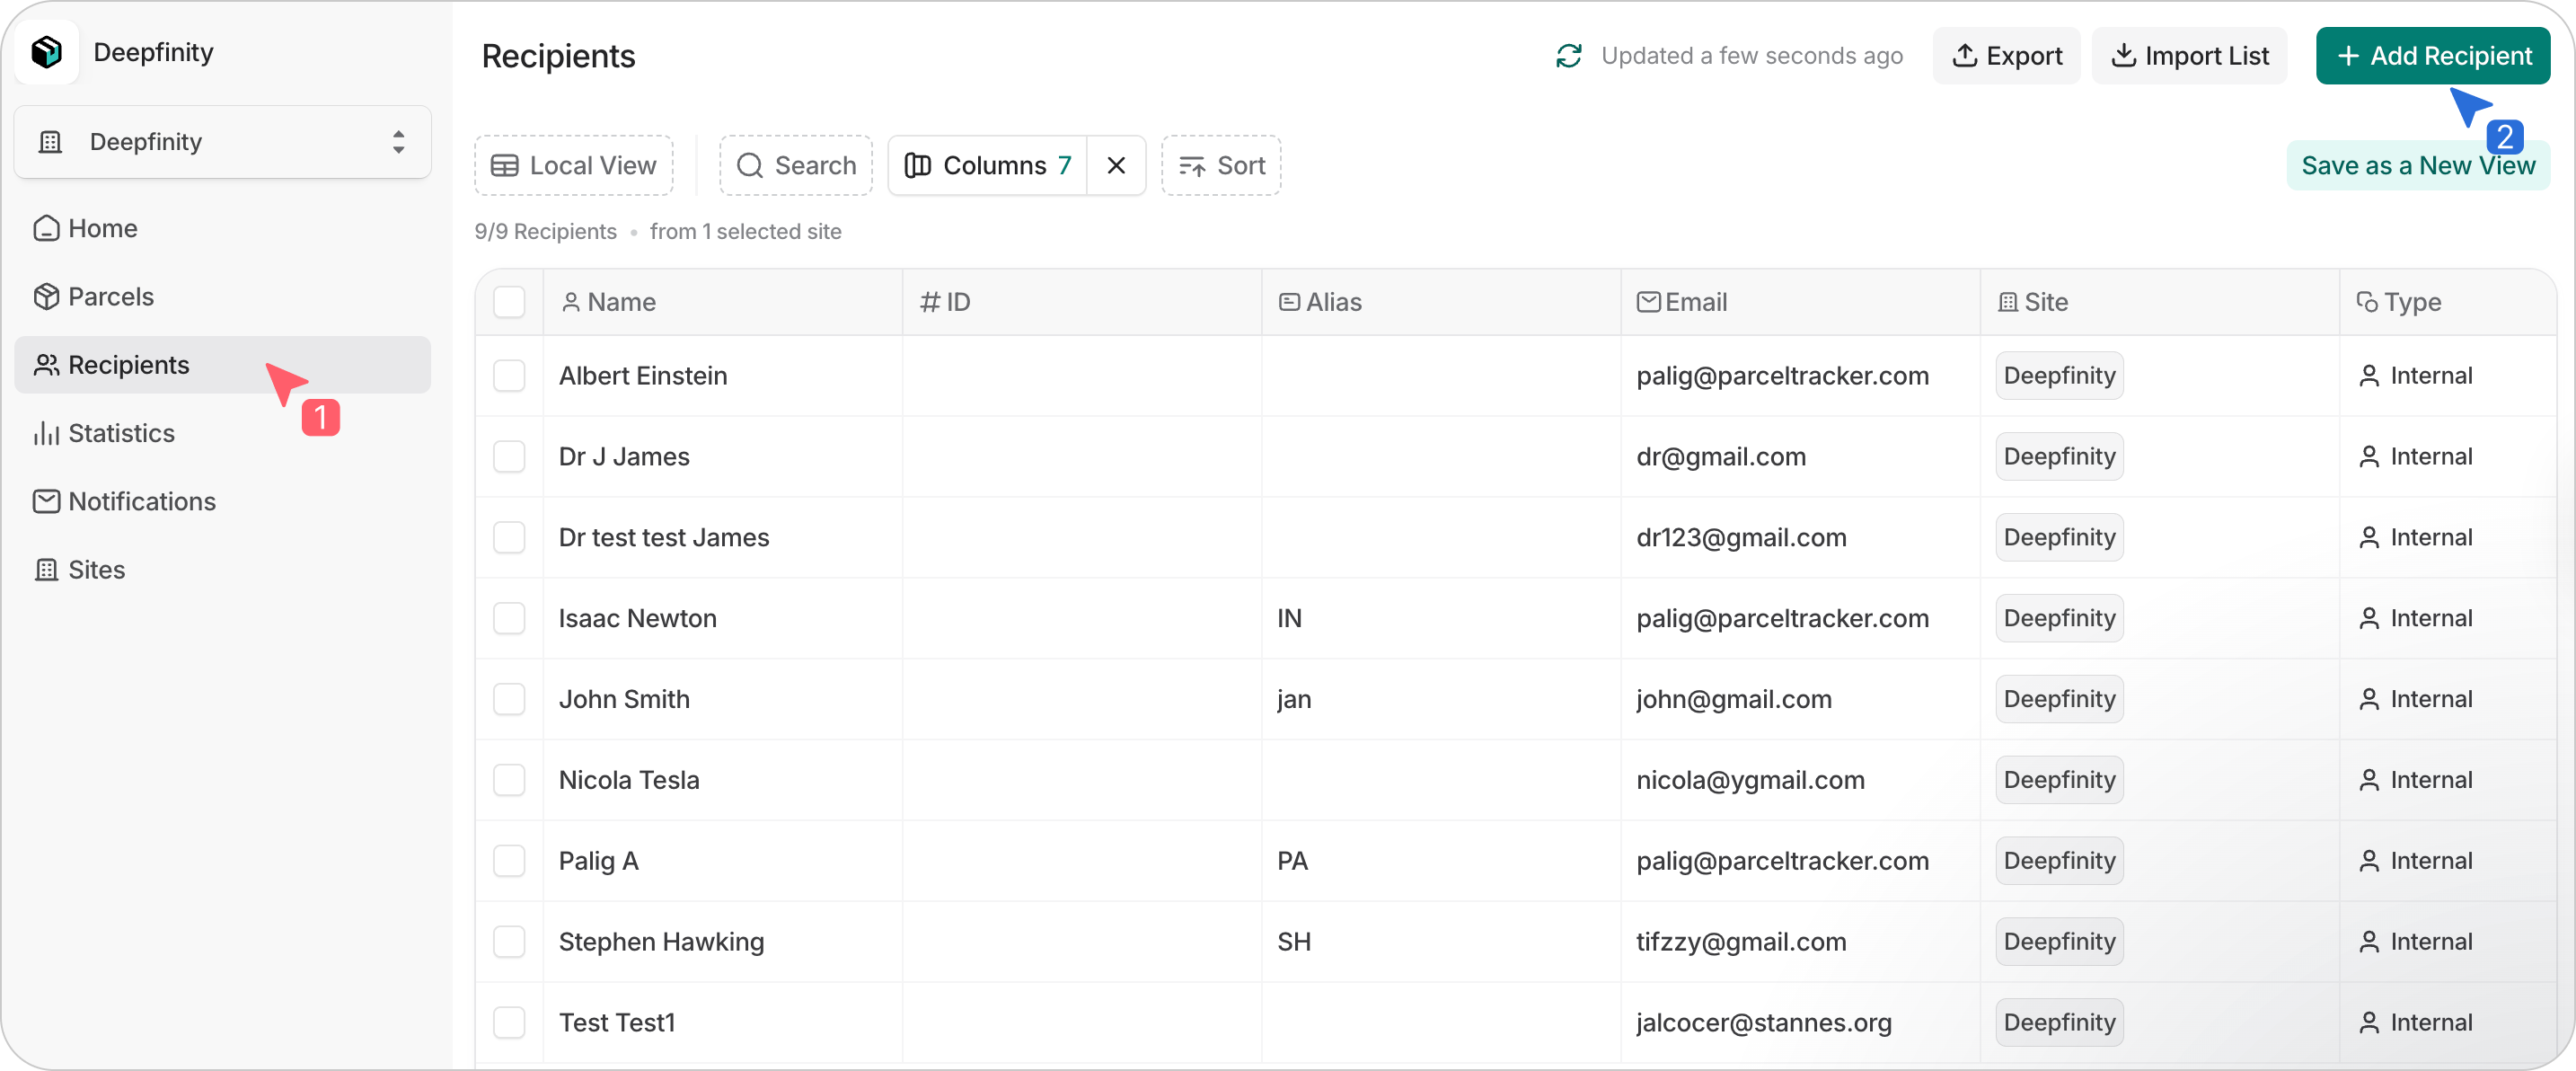
Parcel Tracker will flag errors or duplicates during the process. You can also add recipients individually by clicking Add Recipient.
4. Set Up Scanning Devices for Warehouse Teams
Parcel Tracker works on Apple and Android phones or tablets.
Recommended devices:
- iPhone SE or newer
- Android devices with at least 6GB RAM and a 2.8GHz processor
Warehouses may use shared devices at receiving areas or allow staff to use personal phones. If teams want to track which staff member handled each shipment, users should be added as Mailroom Users.
To add users:
- Go to Mailroom Users → Invite User
- Assign roles based on responsibilities
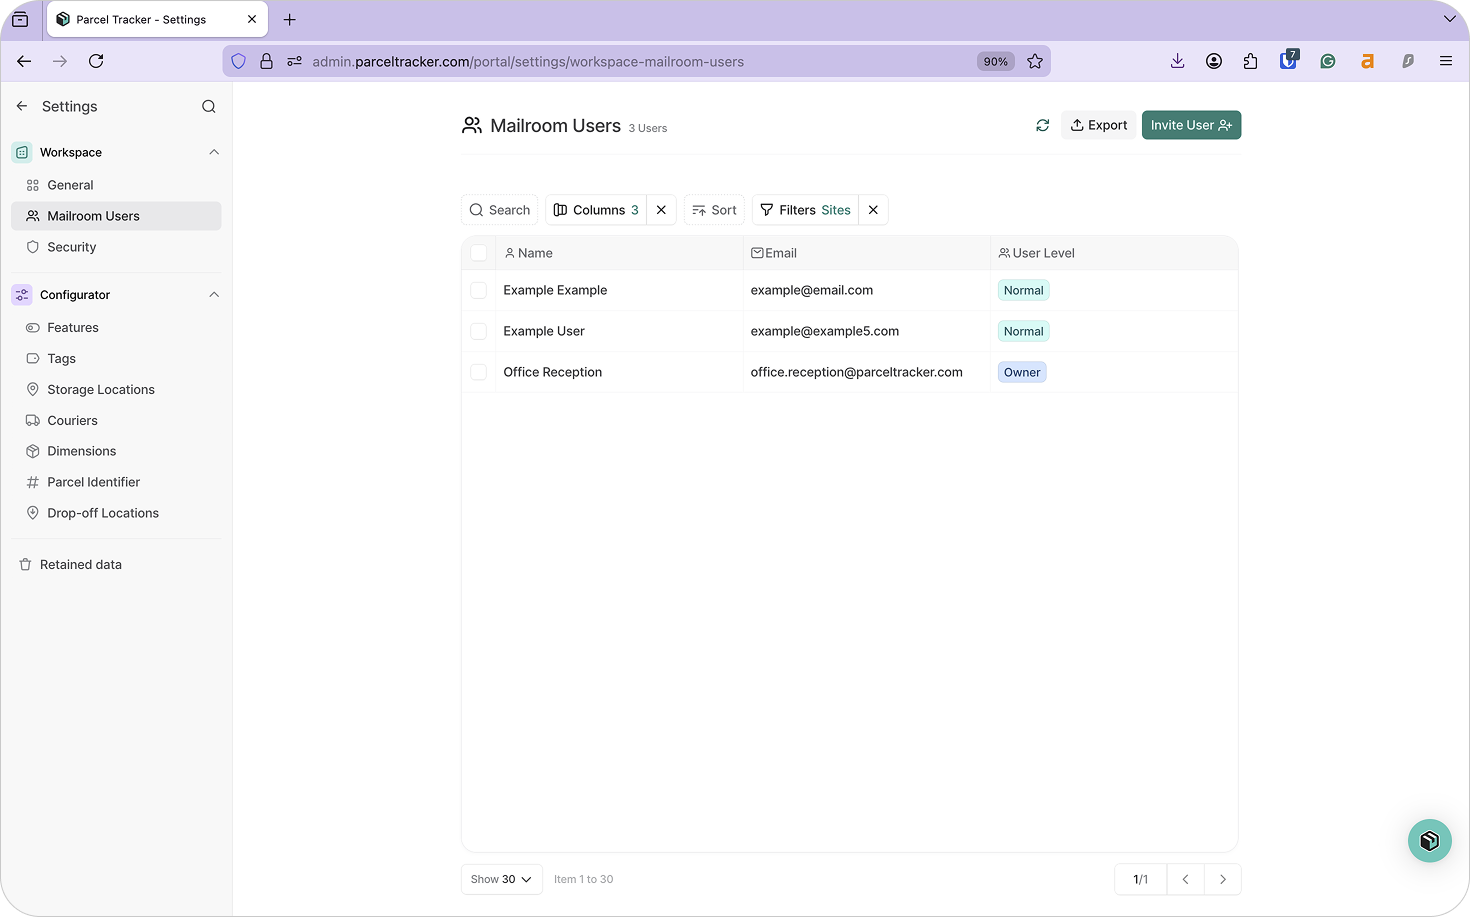
You can restrict site access so teams only see shipments relevant to their facility. When viewing a shipment record in Parcel Tracker, you will be able to see which user handled each step, provided they were logged in during the process.
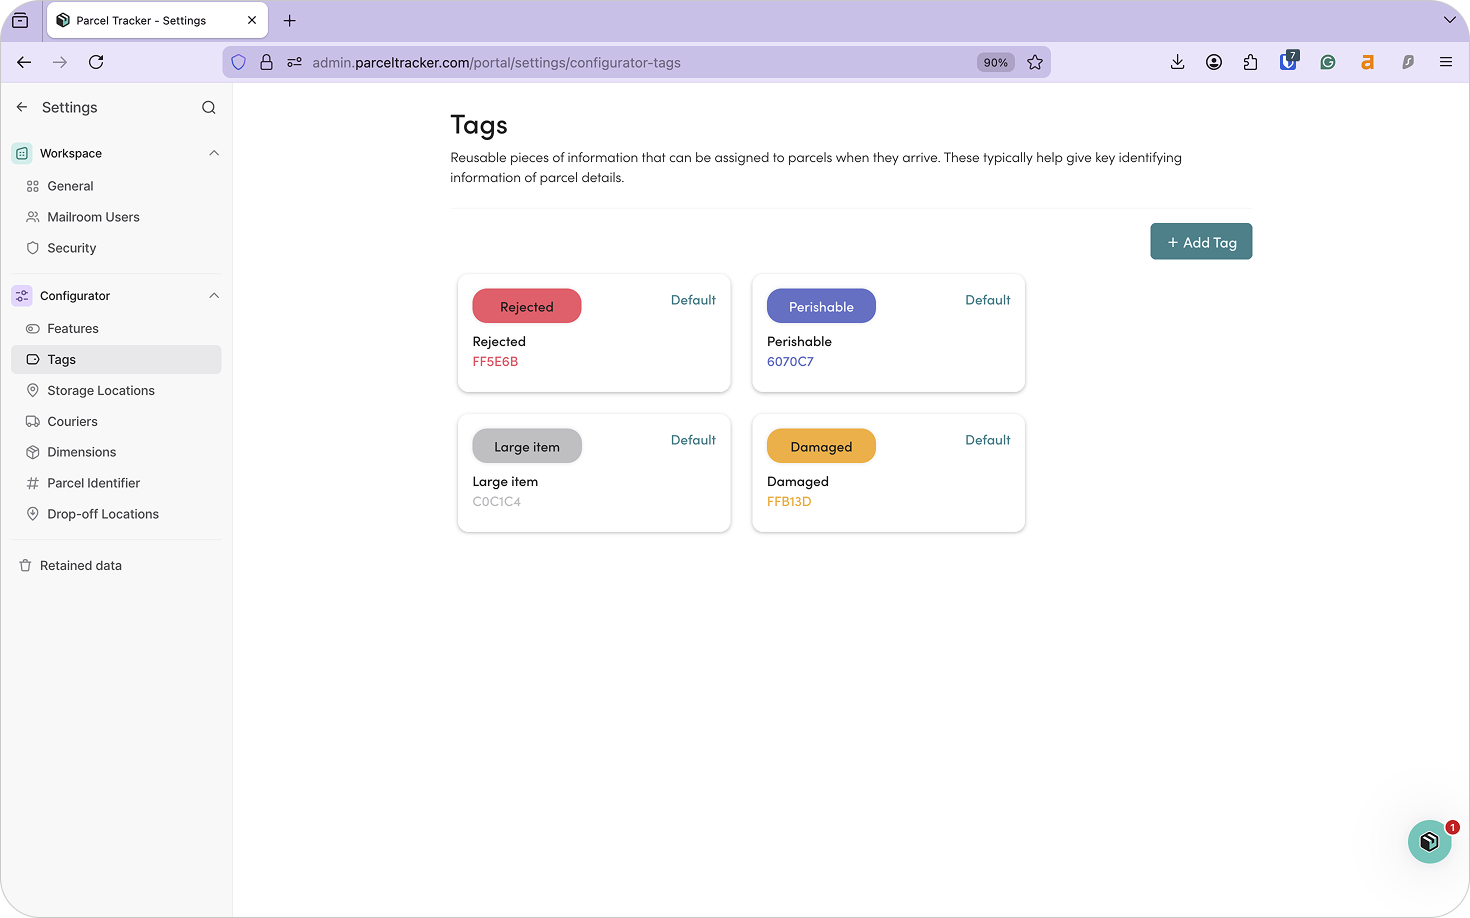
5. Configure Shipment Tags
Tags help teams understand how shipments should be handled or routed.
Common freight forwarding tags include:
Handling
- Fragile
- Hazardous Material
- Temperature Controlled
Routing
- Air Freight
- Sea Freight
- Road Transport
Workflow
- Consolidation Required
- Priority Shipment
- Customs Documentation Pending
Clear tagging ensures teams know what action is required at each stage of handling. To add a tag, click Add Tag and assign it a name and custom color.
6. Configure Notifications and Branding
Parcel Tracker can notify recipients when shipments are logged or ready for collection.
Notification types include:
- Delivery: Notifies the recipient that their shipment has arrived and is ready for collection.
- Collection: Confirms that a shipment has been picked up or delivered.
- Reminder: Can prompt recipients to collect shipments that remain unclaimed.
- Sign-up: Confirms that a recipient has been added to the system.
To customize notifications:
- Open the Notifications tab
- Select Actions → Edit to adjust messaging or enable additional parcel information
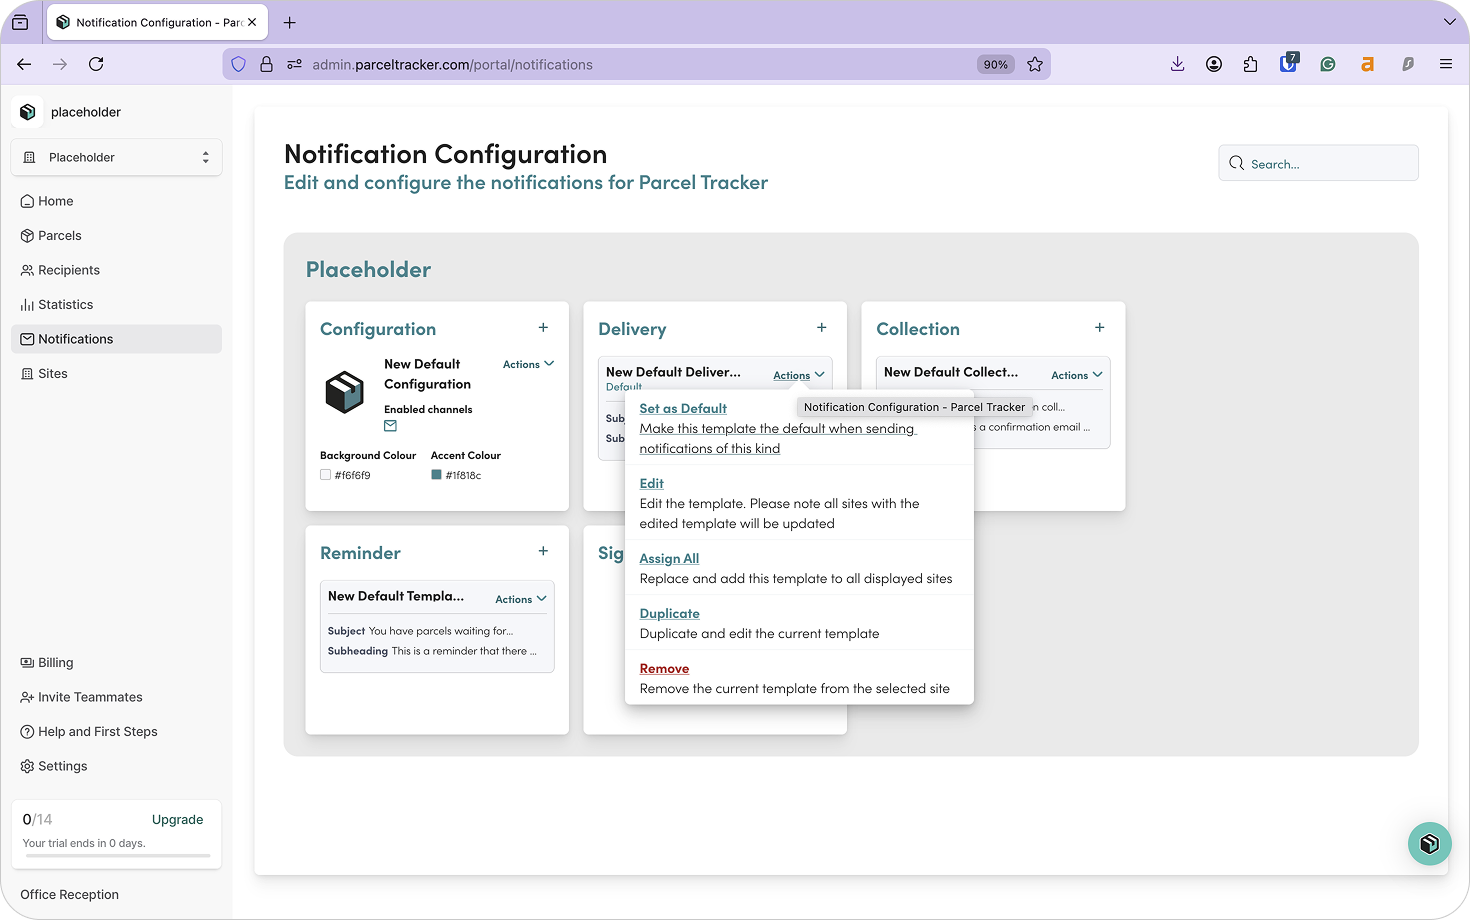
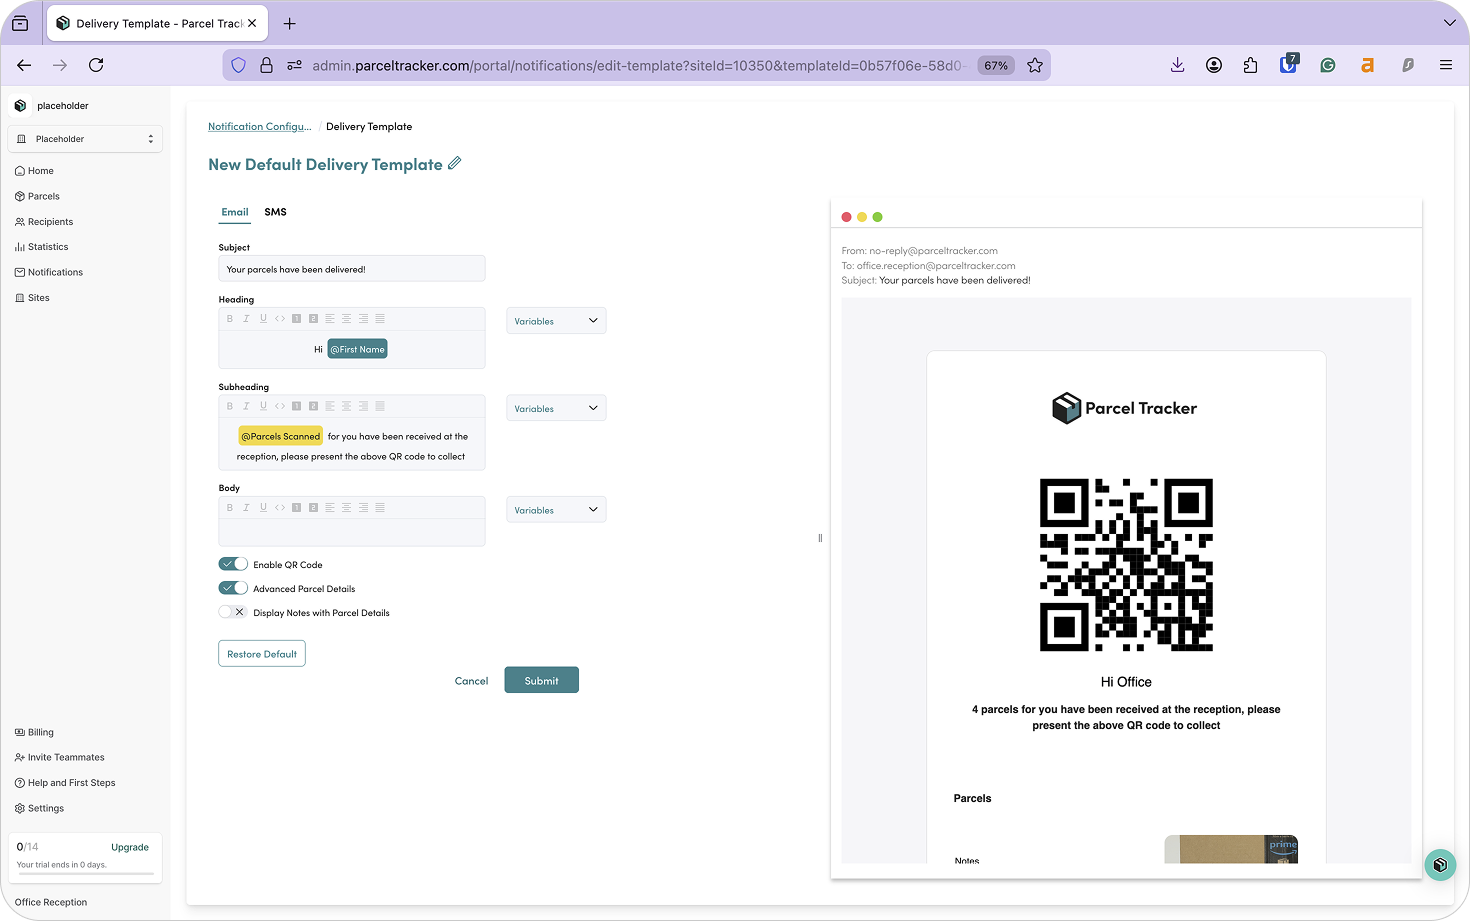
Notifications can be configured per site to support different workflows at different facilities. You can disable recipient QR codes for sites that don’t need them or disable the notification entirely.
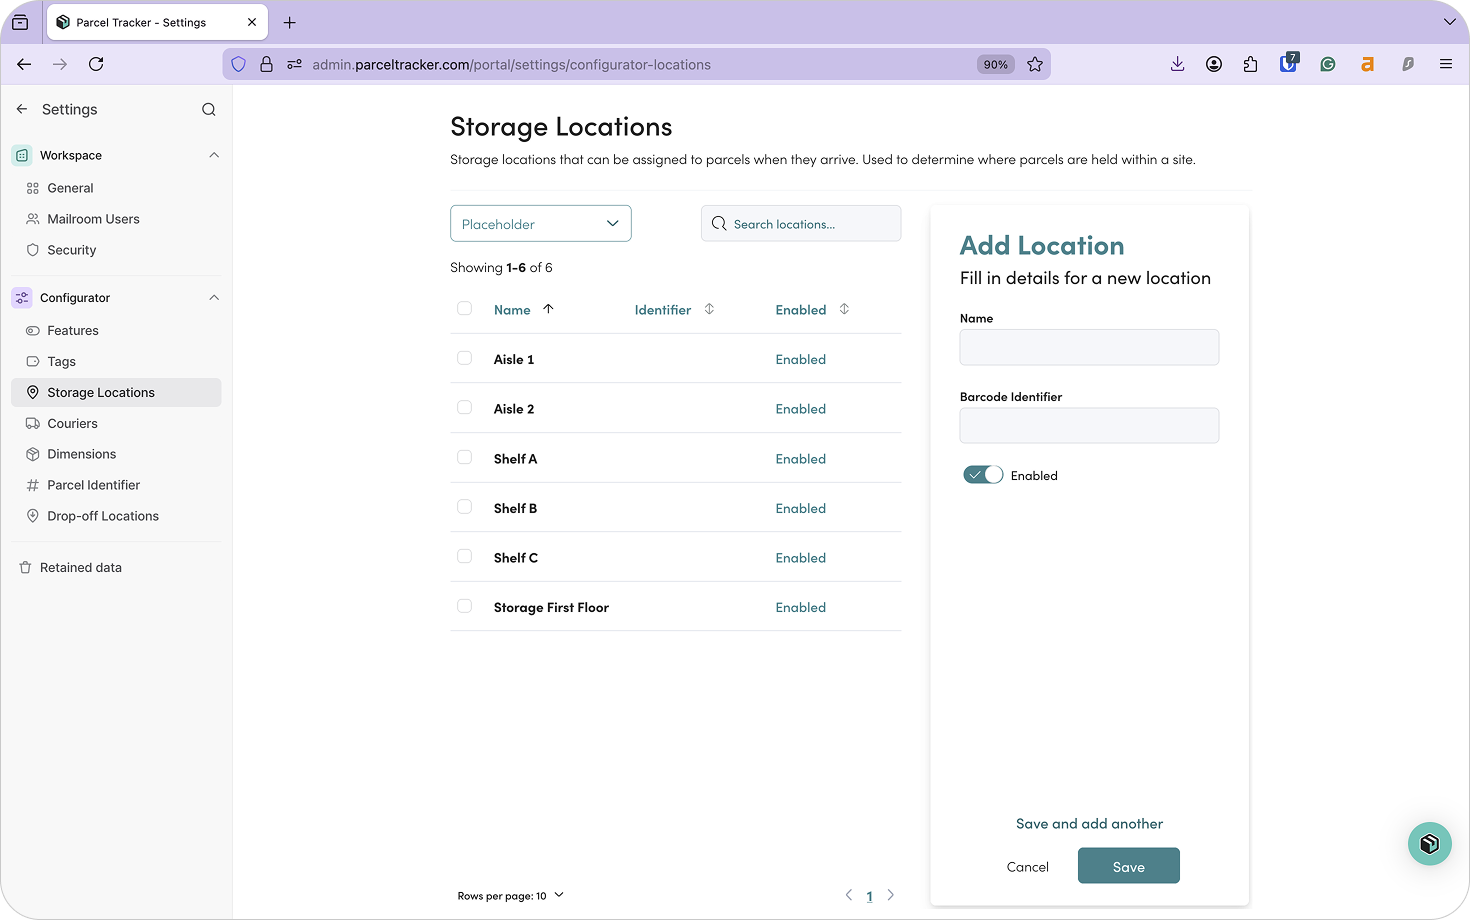
7. Set Up Storage Locations
When shipments are scanned into Parcel Tracker, teams can assign a Storage Location. This allows warehouse staff to quickly locate shipments when they are ready for dispatch or customer pickup. In large freight facilities, shipments may be stored across multiple areas. Assigning precise storage locations ensures items do not become misplaced.
Examples for freight forwarding environments:
- Pallet Row A – Slot 3
- Cage B – Section 2
- Staging Area – Air Freight
- Consolidation Zone
These locations mirror the physical layout of the warehouse and help teams retrieve shipments quickly. To add a new storage location, click Add Location and fill in the necessary details.
8. Download Parcel Tracker for Mobile
Download Parcel Tracker – Mailroom from the App Store or Google Play Store and sign in using your account credentials.
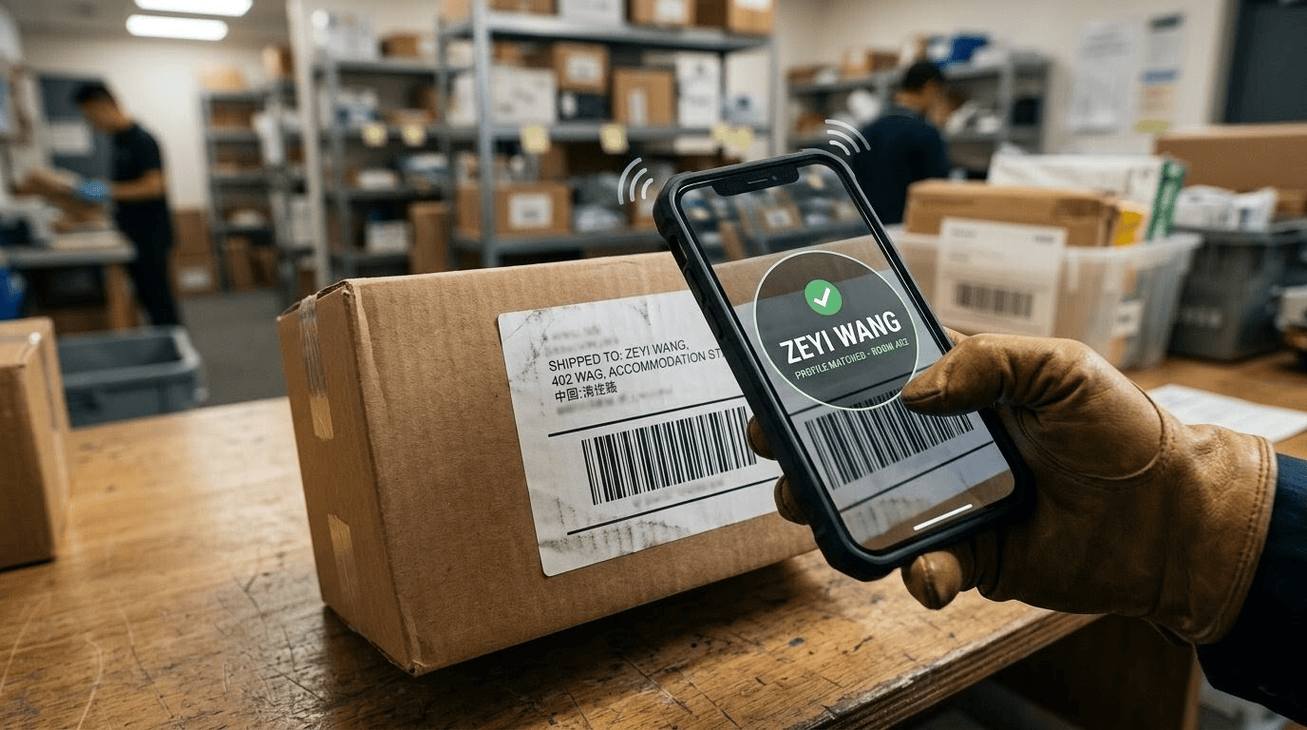
9. Shipment Check-In
When shipments arrive at your facility:
- Select Scan Parcels
- Press and hold to capture the recipient name and barcode
- Take a photo of the shipment
- Assign tags and storage locations
- Press Submit to create the shipment log
Teams can scan multiple shipments consecutively.
After scanning:
- Press Next to review
- Press Check In
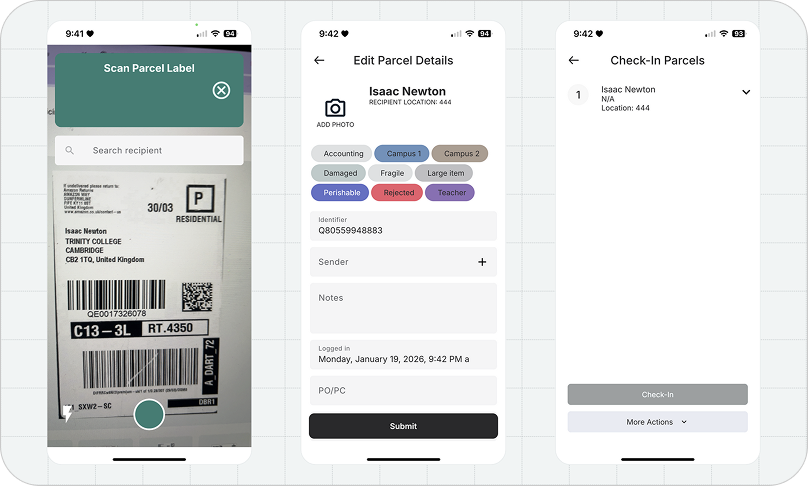
Shipments will now appear under Checked In and can be viewed through the Manage tab or the Parcels tab on the dashboard.
10. Transfer Shipments Between Facilities
Shipments often move between warehouses during freight forwarding operations. When shipments are ready to be sent to another warehouse, they can be dispatched using Batch Check Out. This marks the shipments as Expected at the destination warehouse and informs the receiving team that shipments are currently on the way and should arrive soon.
To transfer shipments:
- In the Out tab, select Batch Check Out
- Scan or select the shipments
- Press Next
- Select Move and choose the destination warehouse

Once dispatched, those shipments will appear as Expected at the destination site.
When the shipments physically arrive, the destination warehouse can reconcile them.
- Go to the In tab
- Select Batch Check In
- Scan the shipment labels
- Select Check In
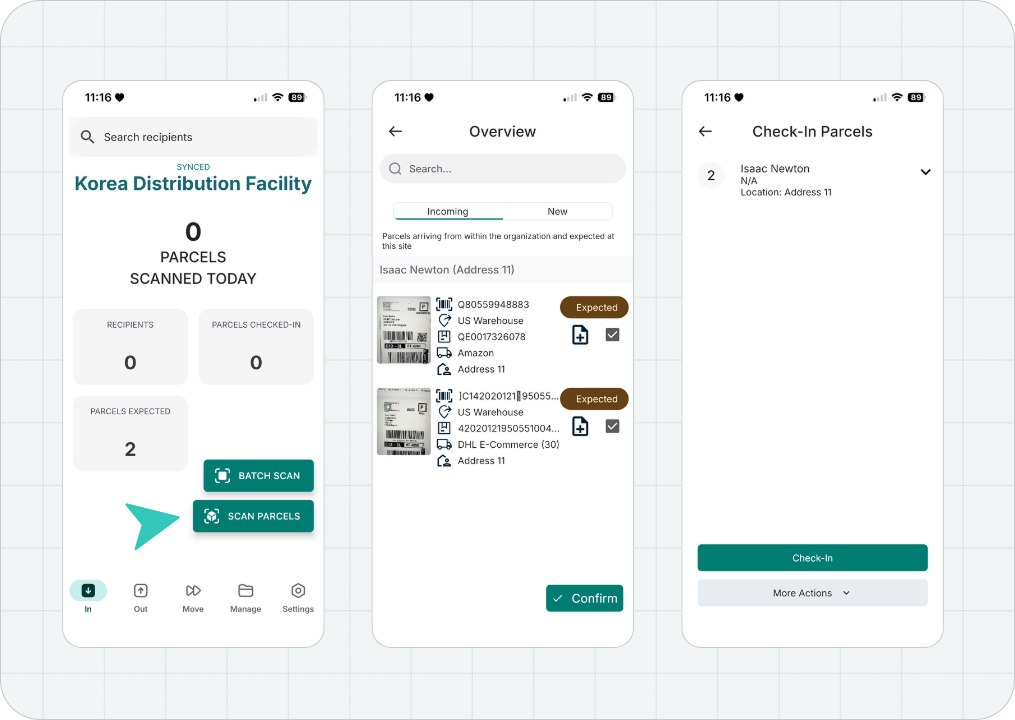
This confirms that the shipments sent from the origin warehouse have been received successfully. If any shipments from the dispatch are missing, teams will immediately know which items were not received. Each transfer between warehouses is logged automatically, creating a clear audit trail across your network.
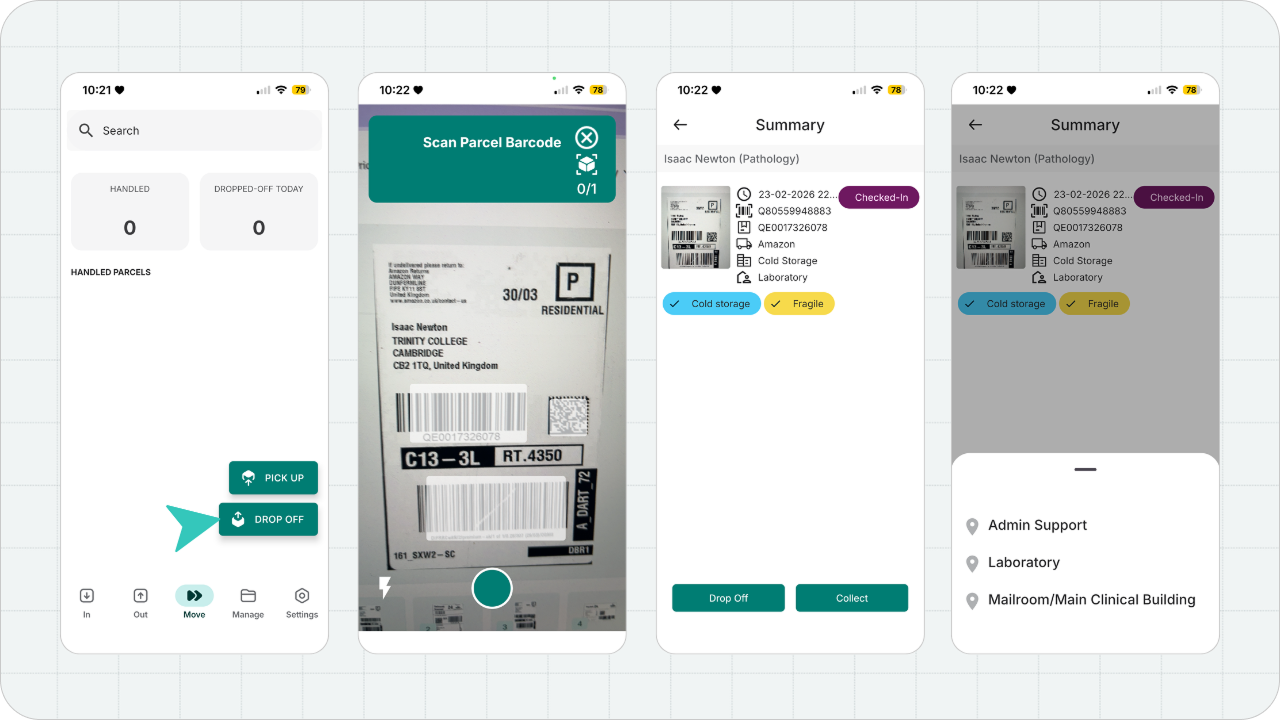
11. Shipment Sign-Out
Shipments can be signed out when an internal courier delivers it to the end recipient, or when a customer collects it at the distribution warehouse.
Via Internal Courier
- From the Move tab, select Pick Up
- Scan or select the parcels
- Select Pick Up again. This marks parcels as Handled.
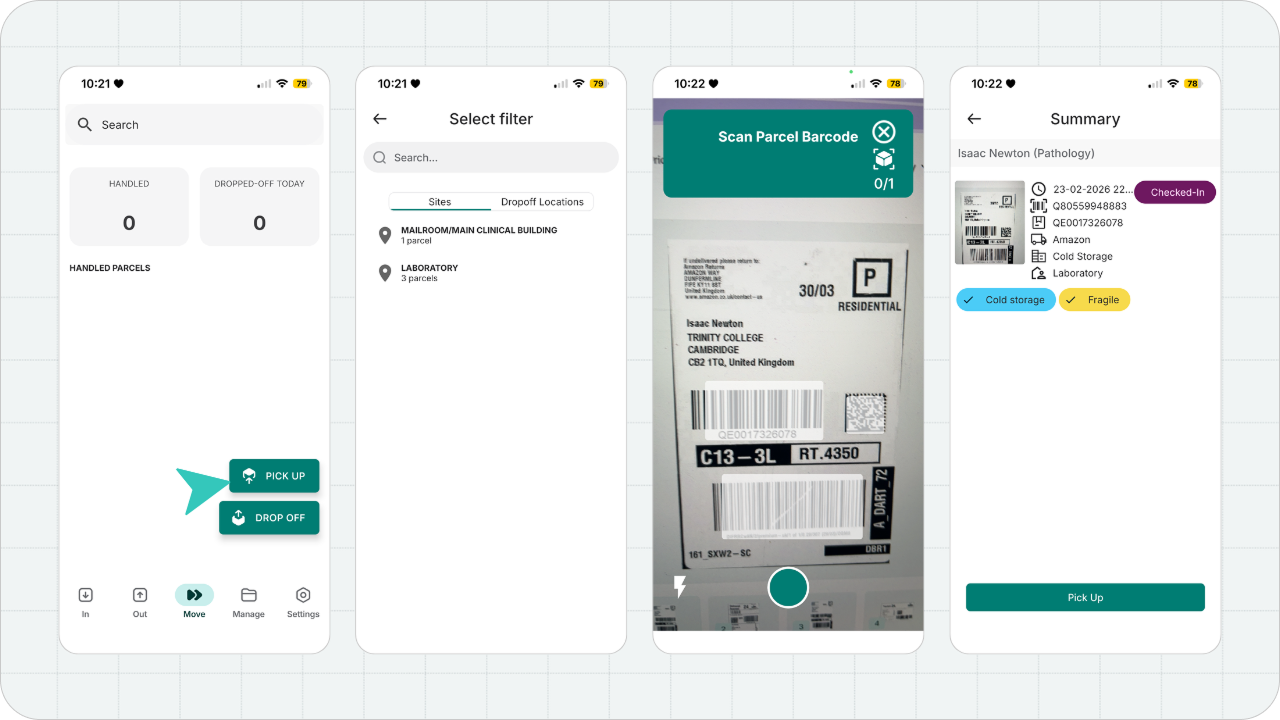
- Upon reaching the end recipient, select Drop Off.
- Scan or select the parcels.
- Instead of Drop Off, select Collect and obtain a signature to confirm delivery.
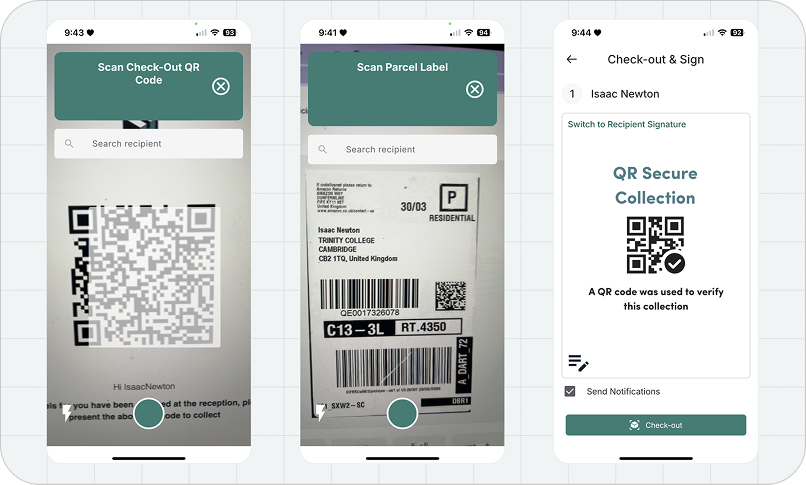
Via Recipient Checkout
The recipient willreceive a unique QR code in their email that they can use to collecttheir parcel. The recipient must present this QR code to staff, and fromthere:
- From the Out tab, select Recipient Check Out
- Scan the recipient's QR code
- Scan or select the parcels they're going to collect
- Press Next and Check Out
Parcel Tracker records these handovers to maintain accountability.
Tip: Use Reporting to Optimize Operations
Parcel Tracker reporting tools help freight forwarding teams monitor:
- Peak intake periods
- Average shipment turnaround time
- Handling volumes by facility
These insights help operations teams plan staffing, optimize staging areas, and reduce bottlenecks.
Improve Internal Parcel Management Across Your Warehouse Network
If you manage multiple forwarding facilities, introducing structured shipment tracking between warehouses can reduce visibility gaps during transfers. Start today by creating a Parcel Tracker account.