Streamlining Office Package Management for Multi-Site Teams


For teams in large office environments, effective parcel management relies on coordination. Items arrive at different buildings, move between departments, and are handed off internally at multiple points before reaching their final destination.
Over time, informal processes, such as spreadsheets, email chains, and verbal handovers, start to create gaps. Teams know deliveries are arriving, but it’s not always clear where they are or who’s responsible at any given moment.
Parcel Tracker helps offices introduce structure to internal movements, giving teams visibility without overcomplicating workflows. If your offices have independent parcel management processes and don’t require the multi-site setup, read the process here.
1. Create a Parcel Tracker Account
Go to parceltracker.com and select Sign Up for Free to create your account. Once logged in, open Settings in the lower left-hand corner to add your company logo and address.
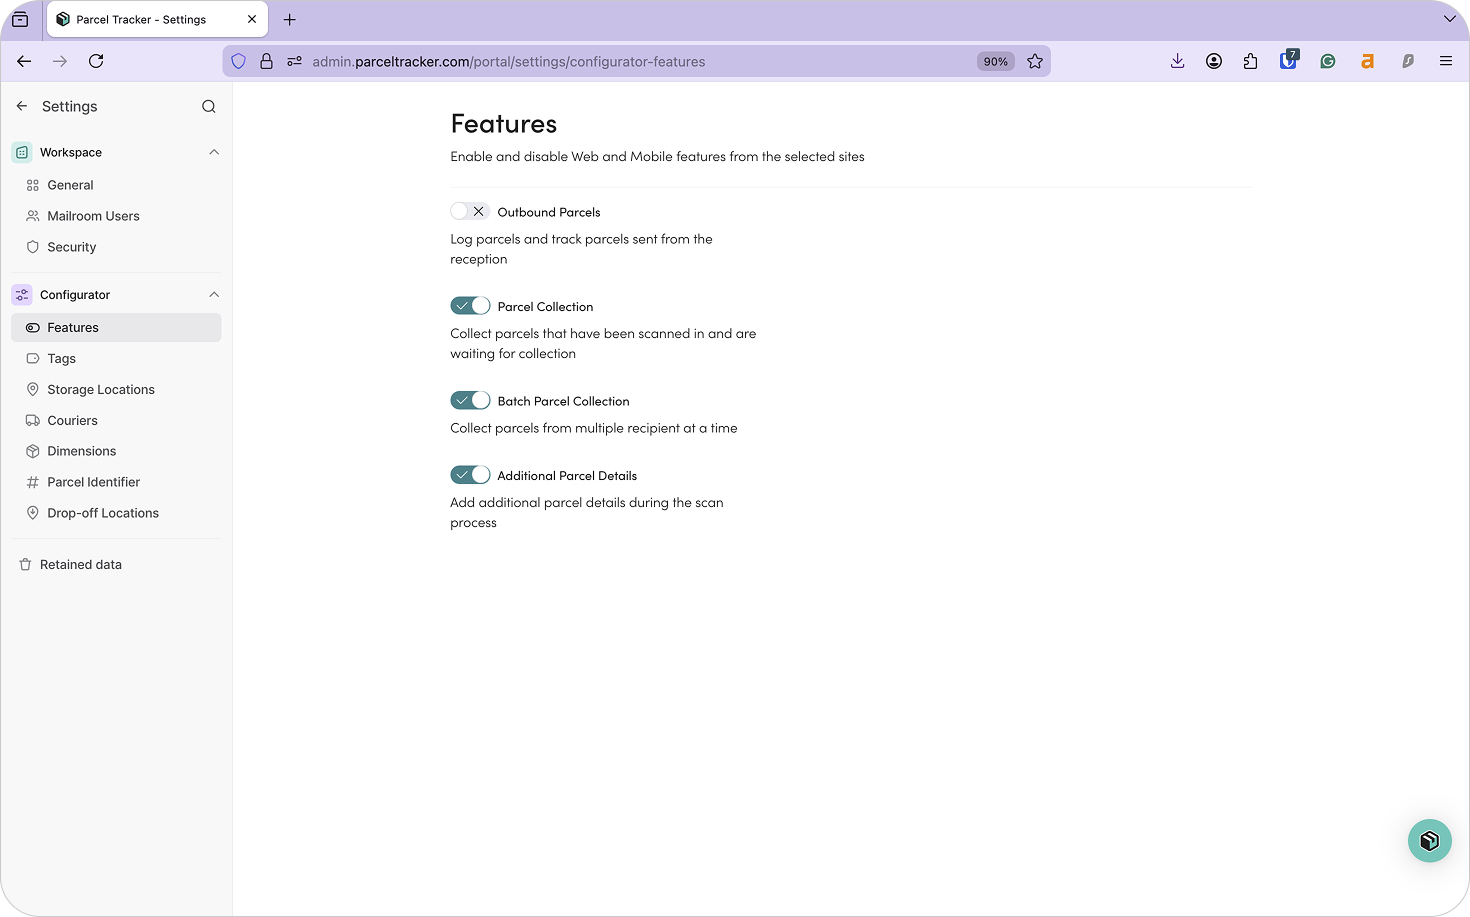
Next, navigate to Settings → Features and enable Additional Parcel Details. This allows your team to:
- Add parcel tags
- Assign storage locations
- Capture a clear photo of parcels at intake
In busy office environments, multiple teams may handle deliveries across shifts and buildings. Capturing detailed information at intake helps maintain consistency and reduces disputes during internal transfers.
You should also enable Batch Check Out if your office will be transferring parcels between buildings to give the receiving team advance visibility.
2. Add Sites
Sites represent the different buildings or intake points within your office campus.
For multi-site offices, sites may include a:
- Central Operations Building
- Department-specific office building
- Specialized facilities building
- Training/conference building
- Logistics hubs
By setting each building up as a site, Parcel Tracker reflects how parcels physically move across your organization.
To add a site:
- Select Sites from the dashboard
- Click Add Site
- Enter the building name and address
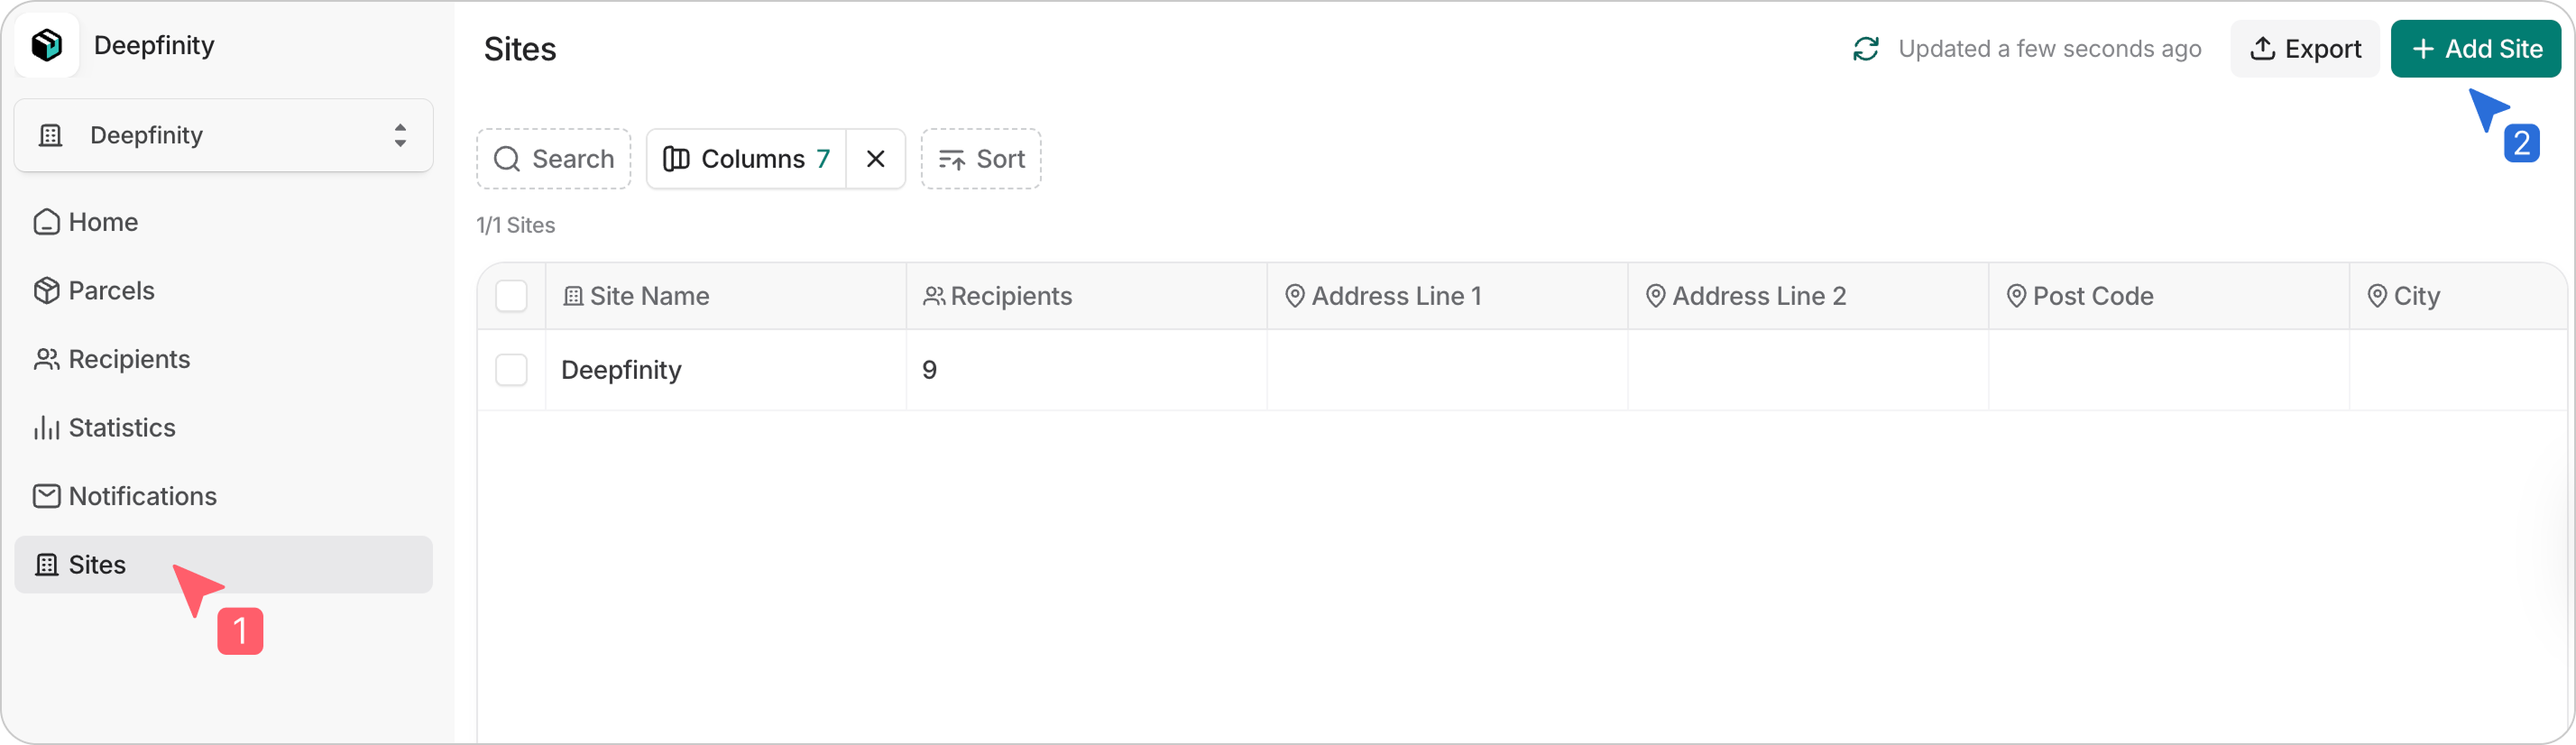
This structure ensures each building maintains visibility over the parcels assigned to it.
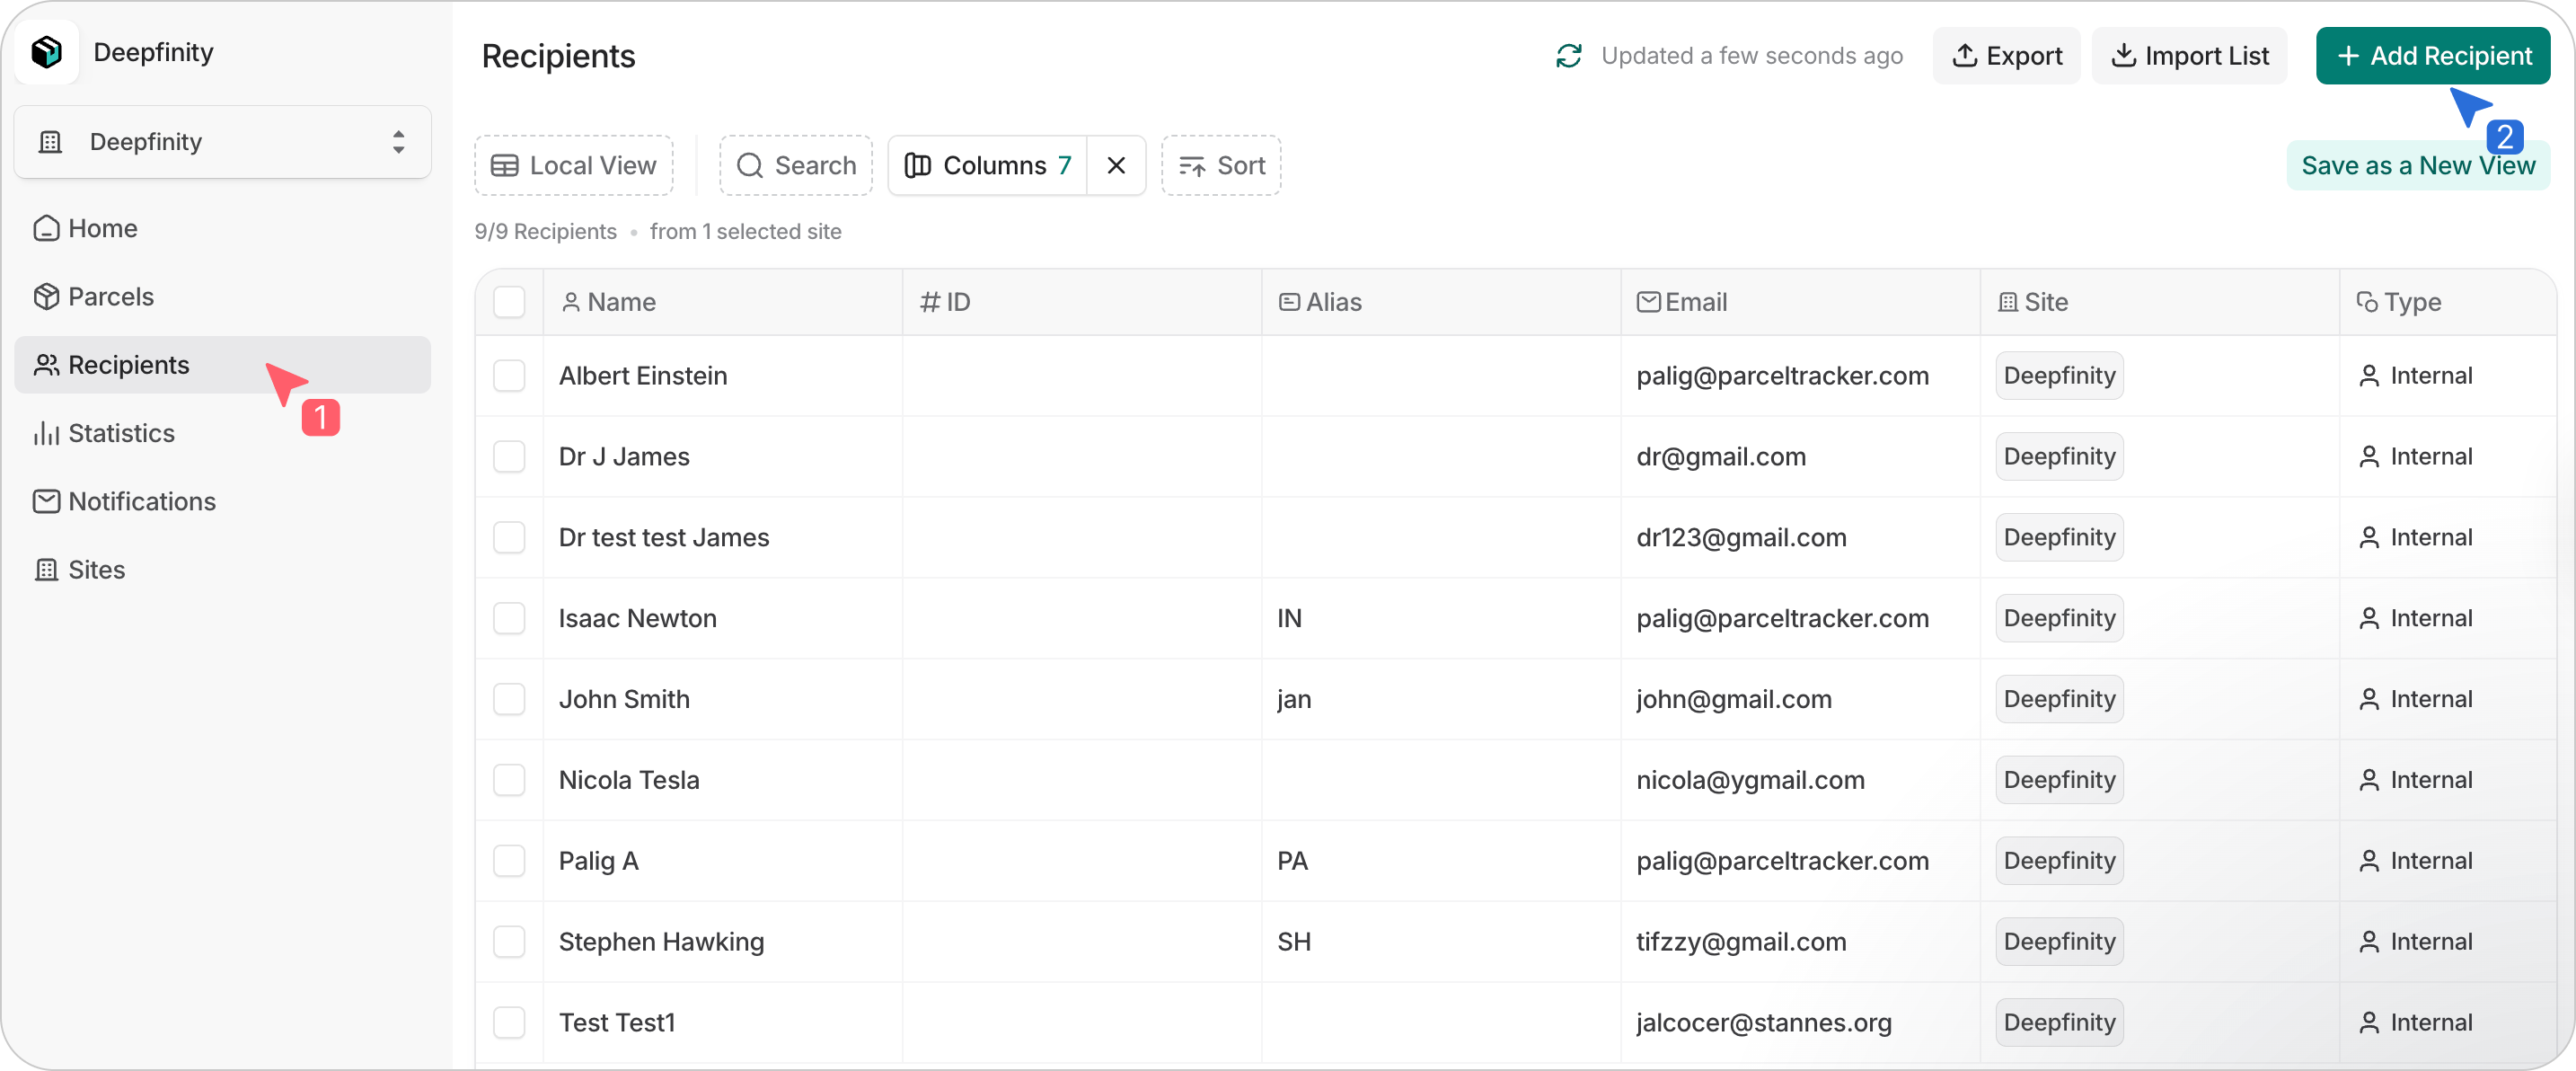
3. Upload Your Recipient List
Before scanning parcels, upload your recipient list. In office environments, this typically includes:
- Staff who receive personal deliveries
- Department representatives responsible for office supplies or equipment
- Facilities contacts
Parcel Tracker uses this list to match parcels automatically and send notifications when items are logged. Without a recipient list, deliveries must be processed manually, increasing delays and the likelihood of misplaced items.
An office recipient list should include:
- First name
- Last name
- Email address
- Location (Department, Floor, Room number)
For multi-site office workflows, also include:
- Site: The building where the recipient is based
- Additional site: The primary intake point (e.g. Central Operations, Receiving Bay, Central Mailroom)
- Drop-off location: The final delivery point within the building
Drop-off locations are especially useful when offices have internal couriers who deliver items to the end recipient. When the courier picks up parcels through Parcel Tracker, the app will organize parcels according to their drop-off locations. This ensures items are routed correctly instead of relying on memory or informal notes.
To upload your CSV:
- Select Recipients
- Choose Import List
- Confirm permission and select Continue
- Map fields and review before completing
Parcel Tracker will flag errors or duplicates during the process. You can also add recipients individually by selecting Add Recipient.
4. Set Up Scanning Devices for Reception or Facilities Teams
Designate the devices your team will use to scan parcels. Parcel Tracker works on Apple and Android phones or tablets.
Recommended devices:
- iPhone SE or newer
- Android devices with at least 6GB RAM and a 2.8GHz processor
Offices may use dedicated devices at each site or allow facilities staff to use personal phones. If teams want to track exactly which staff member handled a parcel, they should be added as Mailroom Users.
To add users:
- Go to Mailroom Users → Invite User
- Assign roles based on responsibilities
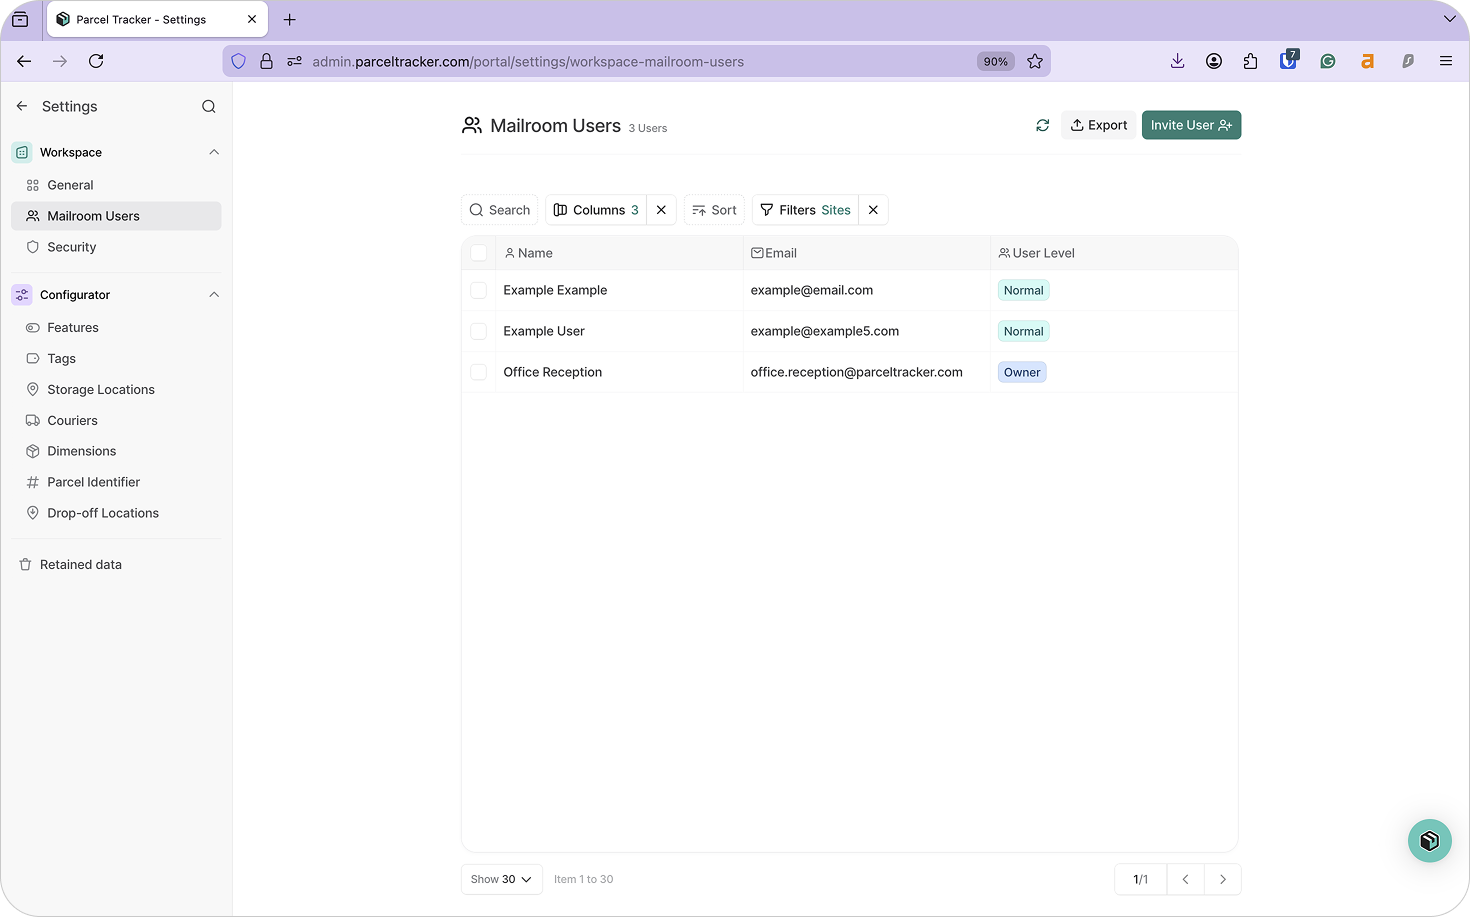
You can restrict site access so teams only see parcels relevant to their building. When you view a parcel log on Parcel Tracker, you will be able to see who handled a parcel, provided that they were logged in through their account at the time of handling.
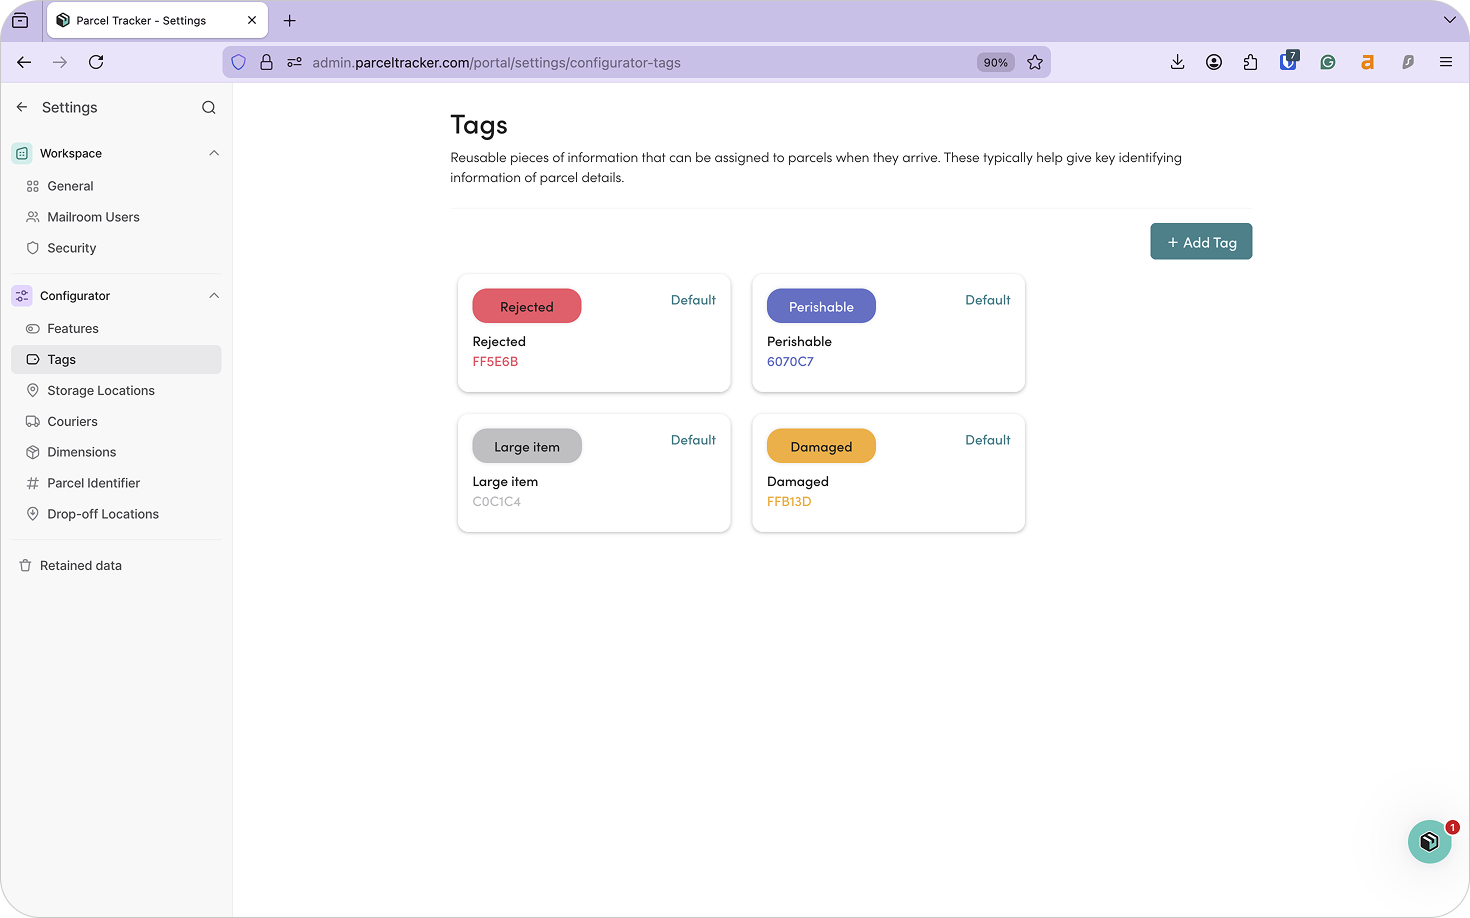
5. Configure Parcel Tags
Tags help teams understand how parcels should be handled and routed.
Common office tags include:
- Handling: Fragile, Damaged, Oversized
- Content: Documents, Office Supplies, IT Equipment
- Routing: Internal Transfer Required, Department Delivery
- Workflow: Signature Required, Priority
Clear tagging reduces confusion during busy delivery periods and ensures internal couriers know what action is required. Click Add Tag and enter name. You may also choose a custom color.
6. Configure Notifications and Branding
Parcel Tracker automatically notifies recipients when parcels are logged, reducing interruptions at reception desks.
Notification types include:
- Delivery: Notifies the recipient that their parcel is ready for collection.
- Collection: A confirmation email that informs the recipient that they've collected their parcel.
- Reminder: Can be set up so that recipients collect their parcels in a more timely manner.
- Sign-up: A confirmation email informing a recipient that they've been added to the recipient directory.
To customize notifications:
- Open the Notifications tab
- Select Actions → Edit to customize messaging and toggle the QR code or additional parcel information.
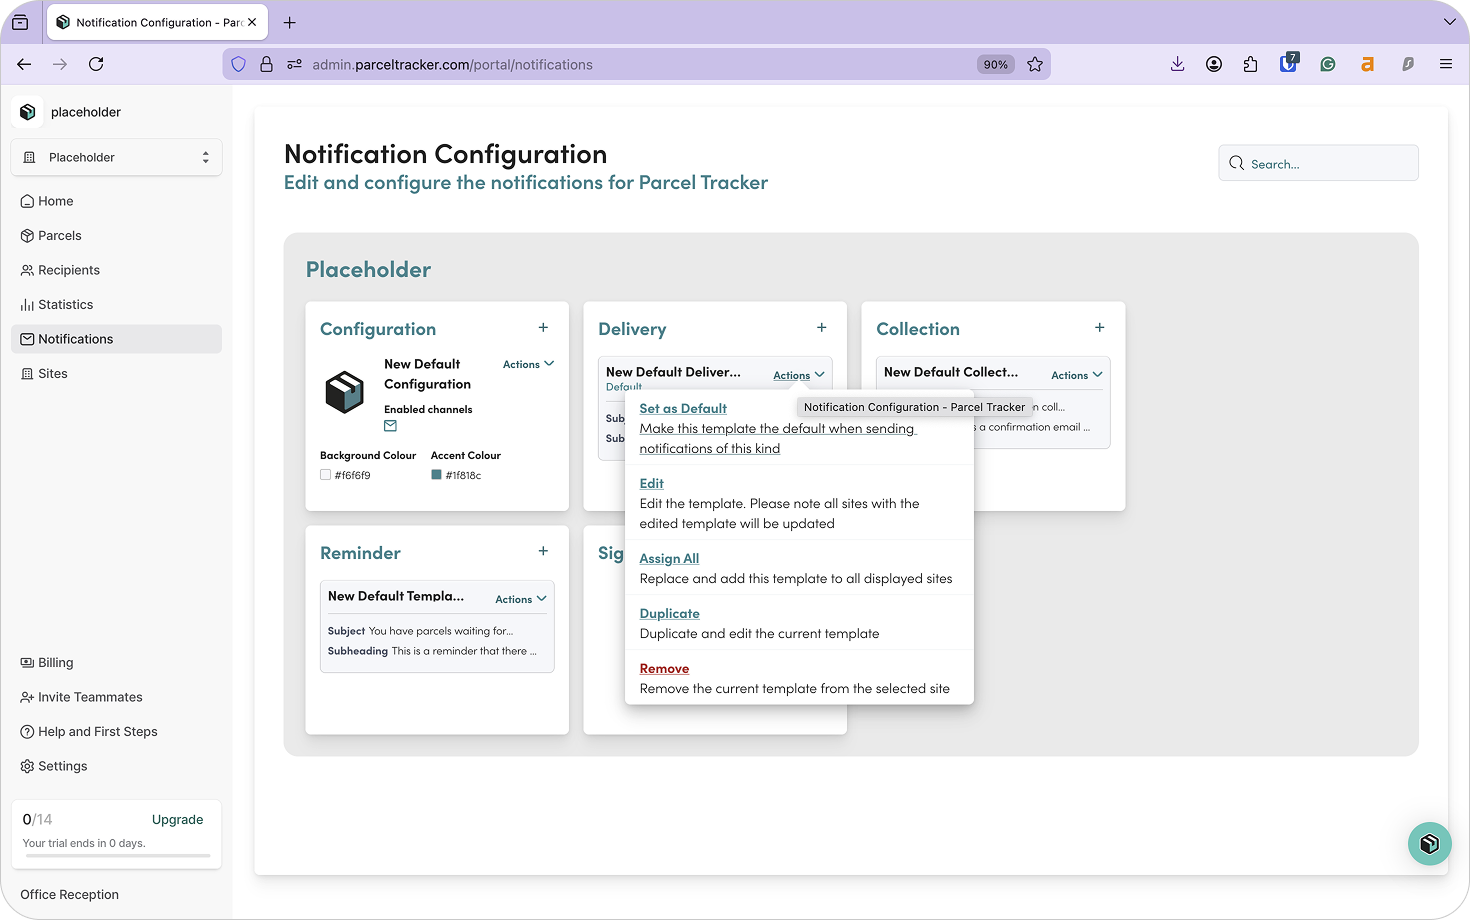
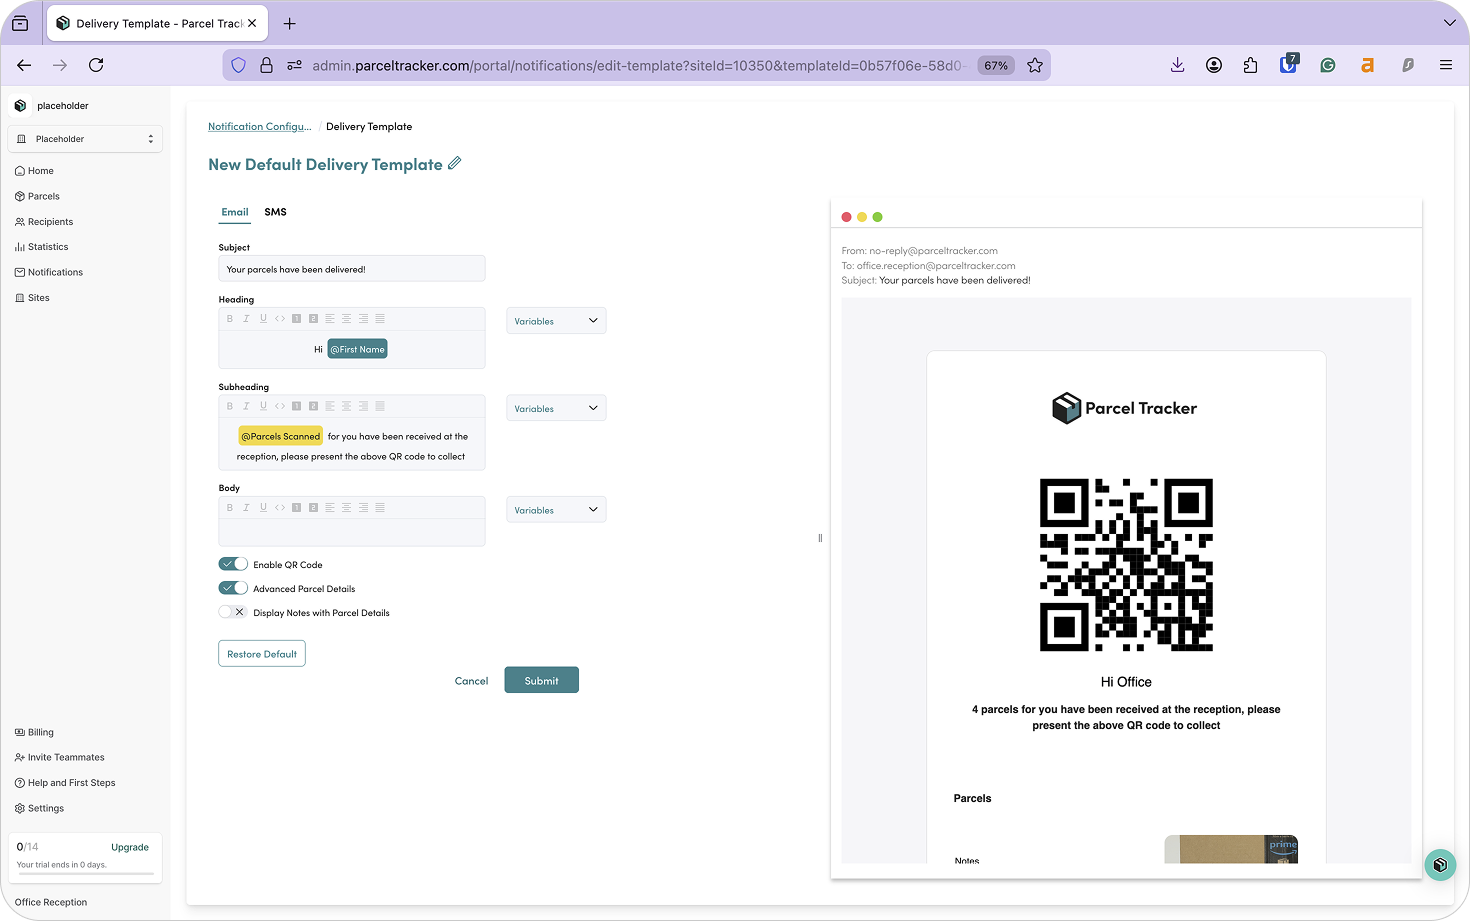
Teams can customize notifications for each site. This helps maintain consistent communication across all buildings.
7. Set Up Storage Locations
When you scan in a parcel through Parcel Tracker, you'll be able to assign it a Storage Location. You can view a parcel's storage location through its log. This helps staff quickly find parcels when they are ready for collection or internal transfer, and reduces the risk of parcels being misplaced.
Instead of storing parcels in a general area, teams can organize them into clearly labeled shelves, lockers, or cabinets. Assigning storage locations during intake ensures every parcel has a designated place.
This is especially helpful in large office environments where parcels may accumulate throughout the day and be handled by multiple staff members.
Examples for office environments:
- Shelf A – Row 1
- Locker 1 / Locker 2
- Facilities Holding Area
- Reception Storage Cabinet
To add a new Storage Location, click Add Location.

8. Download Parcel Tracker for Mobile
Download Parcel Tracker – Mailroom from the App Store or Google Play Store and sign in using your account credentials.
9. Parcel Sign-In
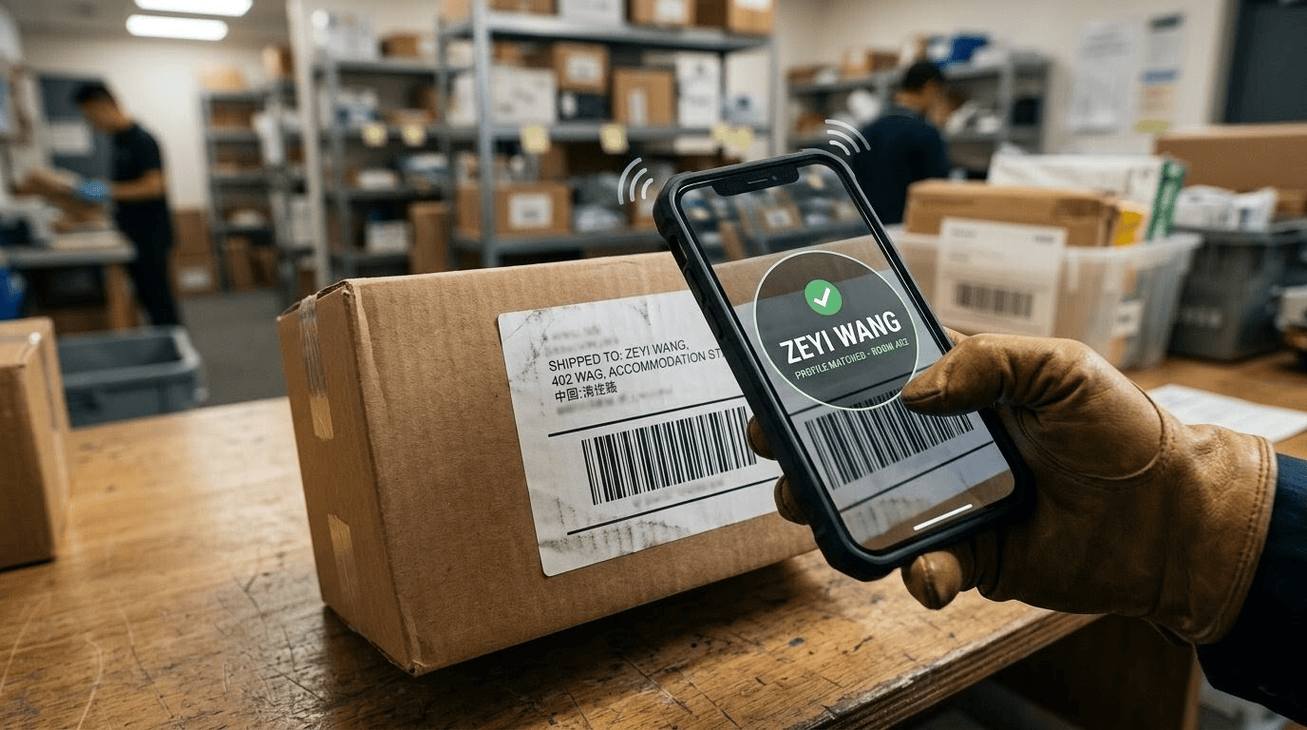
When parcels arrive:
- Select Scan Parcels
- Press and hold the button to pick up the name, and again to pick up the barcode
- Take a photo
- Assign tags and storage locations
- Press Submit to create the log and continue scanning. You can scan multiple parcels in a row.
- When done scanning, press Next. Parcel Tracker will show a preview of all the parcels scanned.
- Press Check In.
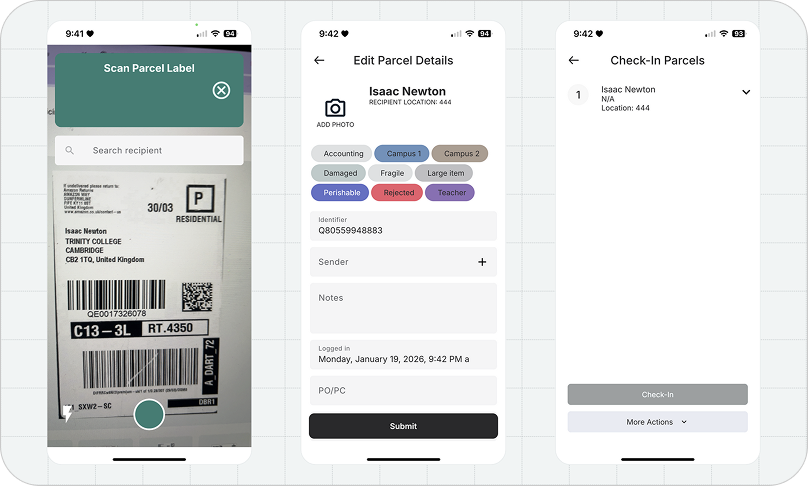
Parcels will now appear on the app under Checked In. You can view their details through the Manage tab on the app, and the Parcels tab on the web dashboard.
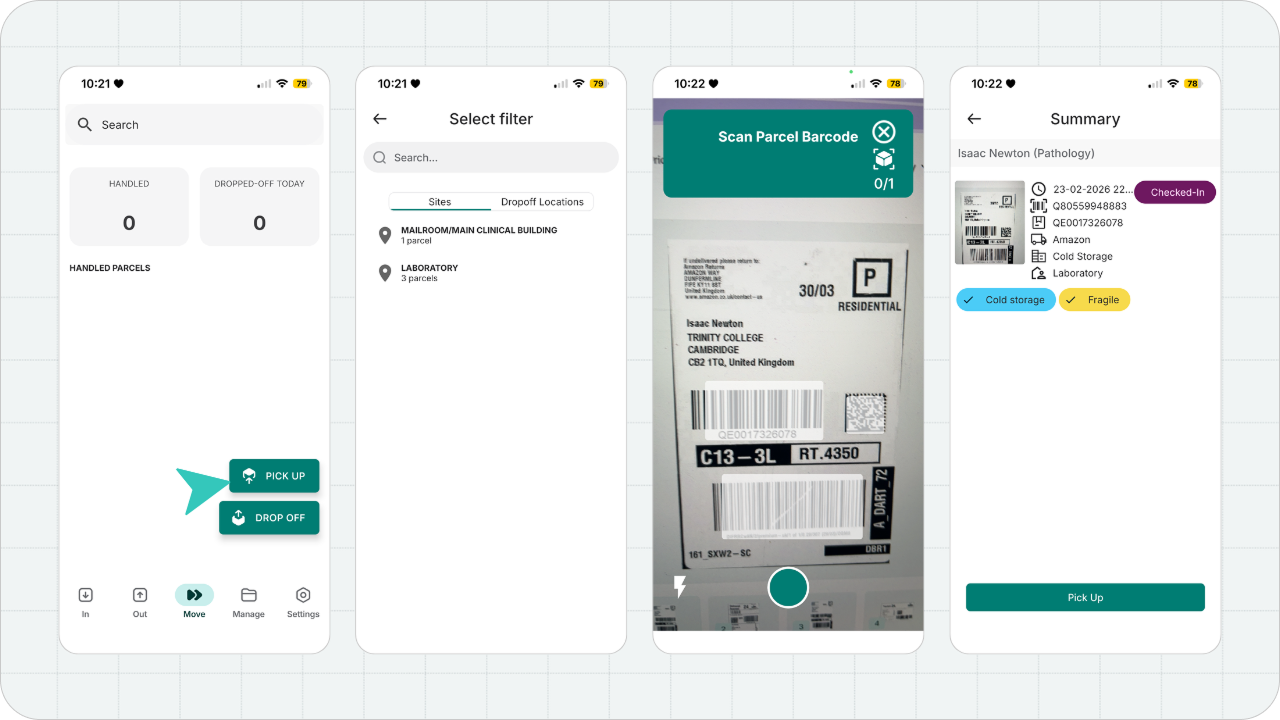
10. Move Parcels Between Buildings
Via Move Tab
Teams can move parcels between sites via the Move tab. We recommend this if you have an internal courier who can pick up and drop off parcels at their designated locations, or deliver them directly to the end recipient.
To pick up parcels:
- Go to the Move tab
- Select Pick-up
- Scan parcels and confirm
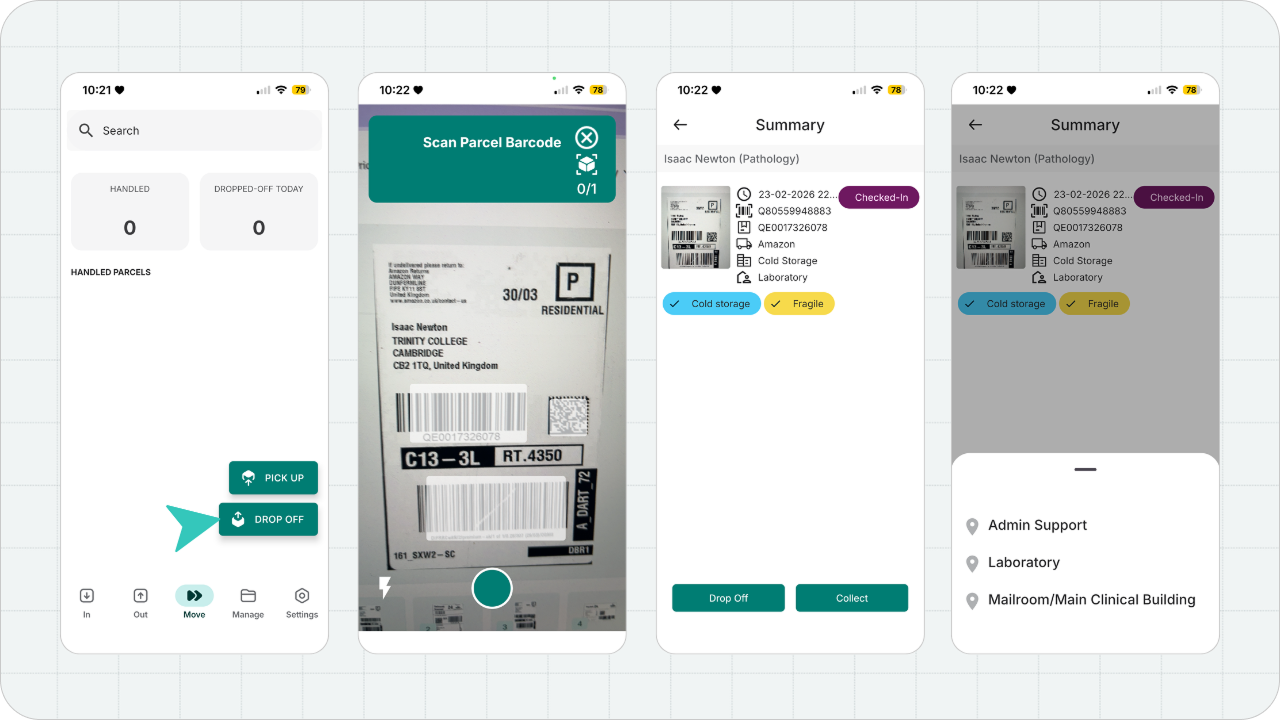
To drop off parcels:
- Select Drop-off
- Choose the destination site
- Confirm and Drop Off
Via Batch Check Out
When parcels are checked out via Batch Check Out, they can be moved to another site in your organization. When this happens, Parcel Tracker marks those parcels as Expected in the destination site.
This means the receiving team can see that parcels are currently in transit between buildings before they physically arrive.
This workflow is particularly useful when:
- Teams need to transfer parcels between regional offices
- The parcel will be handled by a third-party courier
- If teams need visibility as to which parcels are arriving from another office site
To move parcels using this method:
- In the Out tab, select Batch Check Out
- Scan or select the parcels
- Press Next
- Press Move and select the Destination site
Once confirmed, the parcels will be marked as Expected in the destination site. This allows the receiving team to prepare for incoming deliveries and verify that all parcels arrive as planned.
When the parcels arrive at the destination site, teams can reconcile them. This process confirms that the parcels that were dispatched have physically arrived at the new location.
- From the In tab, select Batch Check In
- Scan the parcels to match them to an existing record
- Select Check In
This updates the parcel status and completes the transfer between buildings. Each transfer is automatically recorded in the parcel timeline, providing a clear record of where the parcel has been and who handled it.
11. Parcel Sign-Out
Parcels can be signed out in four ways.
Via Internal Courier
- From the Move tab, select Pick Up
- Scan or select the parcels
- Select Pick Up again. This marks parcels as Handled.
- Upon reaching the end recipient, select Drop Off.
- Scan or select the parcels.
- Instead of Drop Off, select Collect and obtain a signature to confirm delivery.
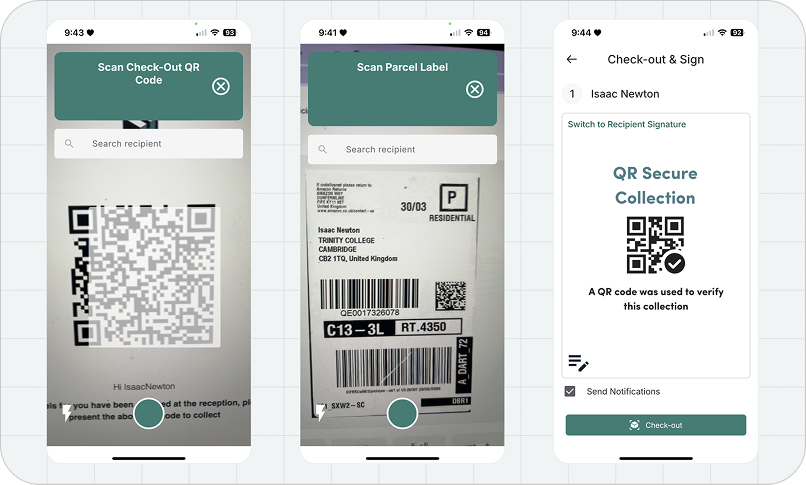
Via Recipient Checkout
The recipient will receive a unique QR code in their email that they can use to collect their parcel. The recipient must present this QR code to staff, and from there:
- From the Out tab, select Recipient Check Out
- Scan the recipient's QR code
- Scan or select the parcels they're going to collect
- Press Next and Check Out
Via Kiosk App
Offices can facilitate self-service collections through the Parcel Tracker - Kiosk app.
- Install the Kiosk app on a dedicated device for the package or storage room.
- Recipients will scan their QR code on the dedicated device
- Recipients will select the parcels they are going to collect
- Recipients will provide an e-signature to confirm collection
Via Web Platform
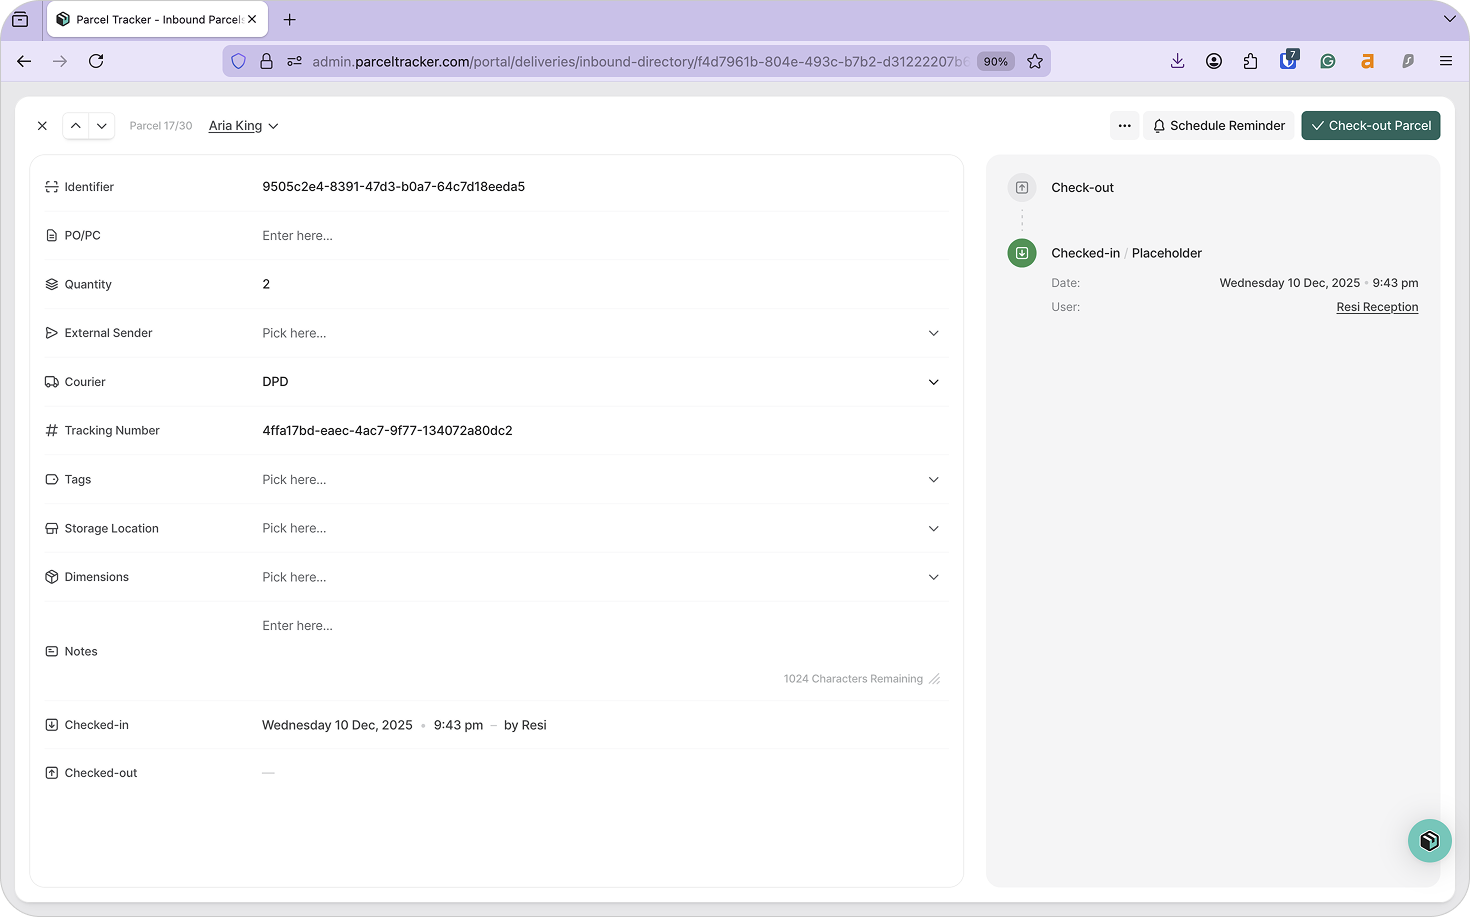
If a mobile device is not available, teams can sign out parcels via the web platform.
- From the dashboard, select the Parcels tab
- Hover over the desired parcel and click Open
- Select Check Out Parcel
- Capture the recipient's e-signature
Tip: Use Reporting to Optimize Workflows
Reporting tools help office campuses understand:
- Peak delivery times
- Average collection times
- Volume trends by building
These insights help facilities teams allocate staff, plan storage capacity, and adjust internal courier routes.
Final Thoughts
Managing deliveries across multiple office buildings requires more than manual logs and informal communication.
With Parcel Tracker, multi-site offices can centralize intake, maintain visibility across buildings, and create a clear audit trail for every parcel. Create a free Parcel Tracker account or explore our multi-site office workflows to get started.