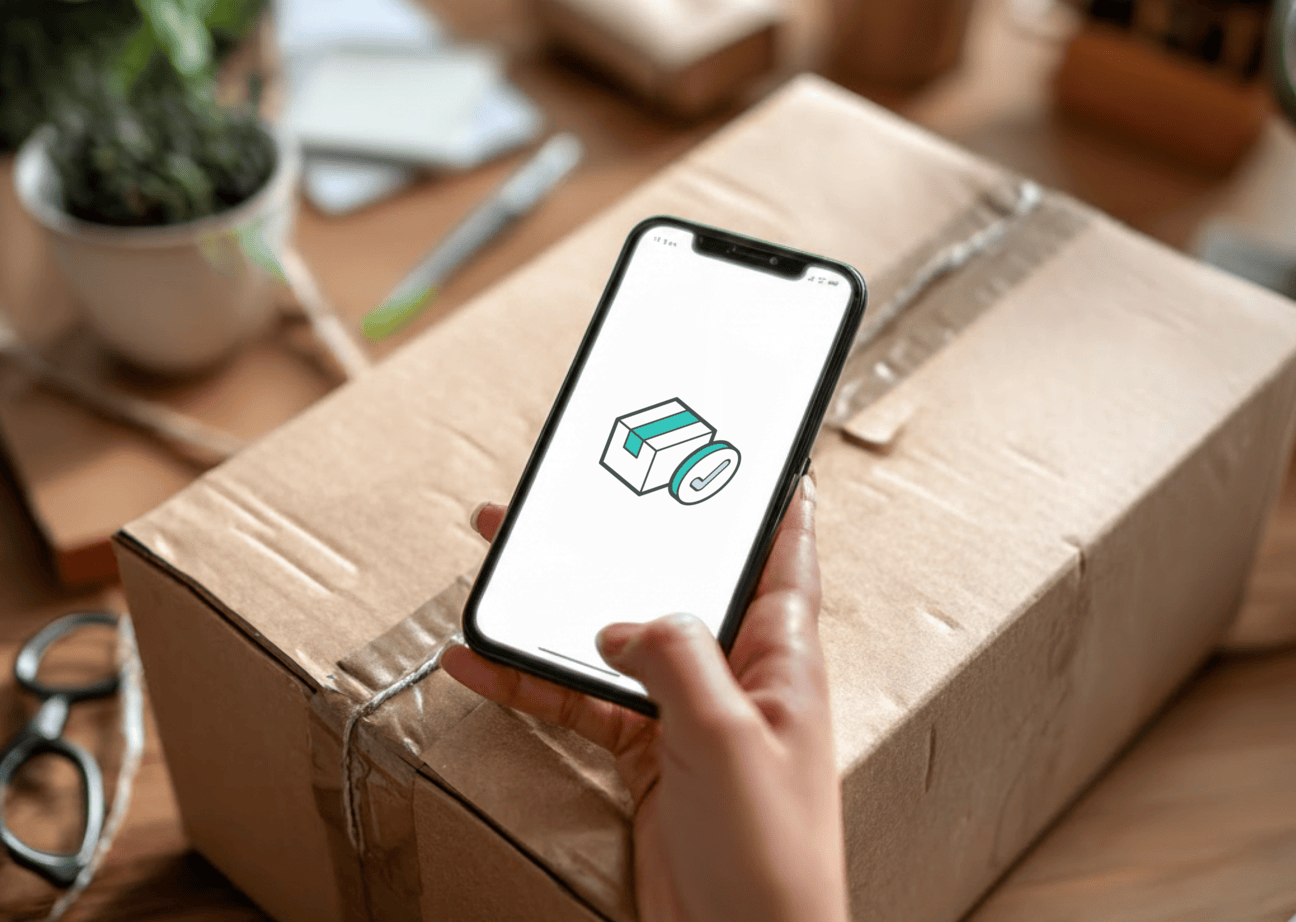
Managing High Parcel Volumes in Student Accommodation


Delivery volumes in PBSAs and student housing often fluctuate throughout the year as students move in and out, semesters begin, and exam periods approach. But when parcels arrive, they tend to arrive all at once. This puts pressure on front desk and mailroom teams, who must balance parcel management alongside day-to-day operational responsibilities.
Automating delivery management with tools like Parcel Tracker brings structure, visibility, and accountability to this process. Below is a step-by-step guide to setting up Parcel Tracker for PBSA environments, so your team is prepared before peak delivery periods hit. By the end of this tutorial, your team will be able to scan parcels using their phones, automatically notify students, and securely check parcels out using a unique QR code or e-signature.
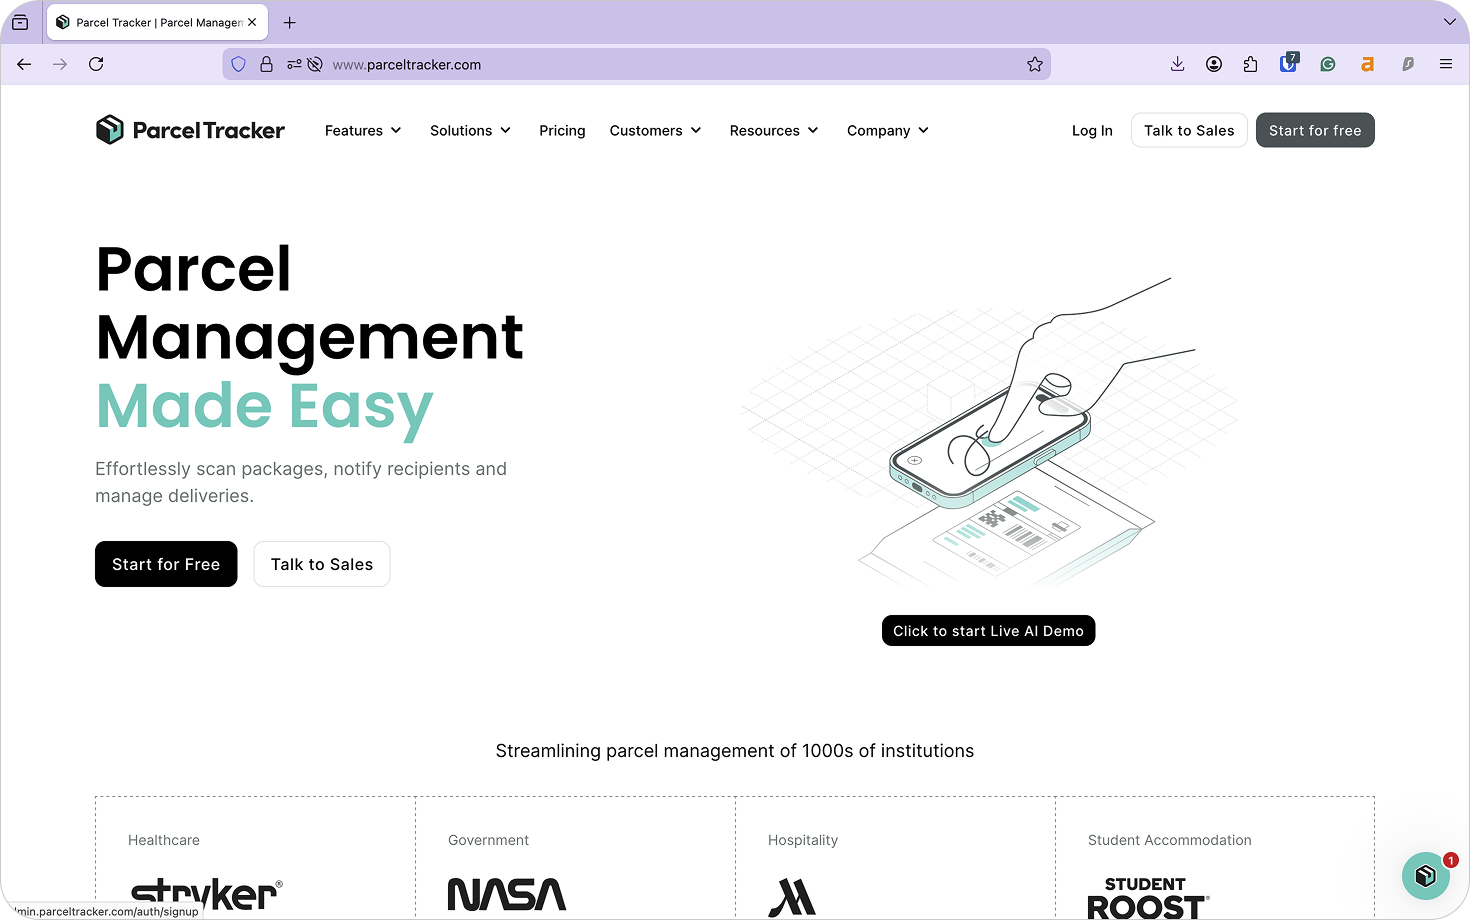
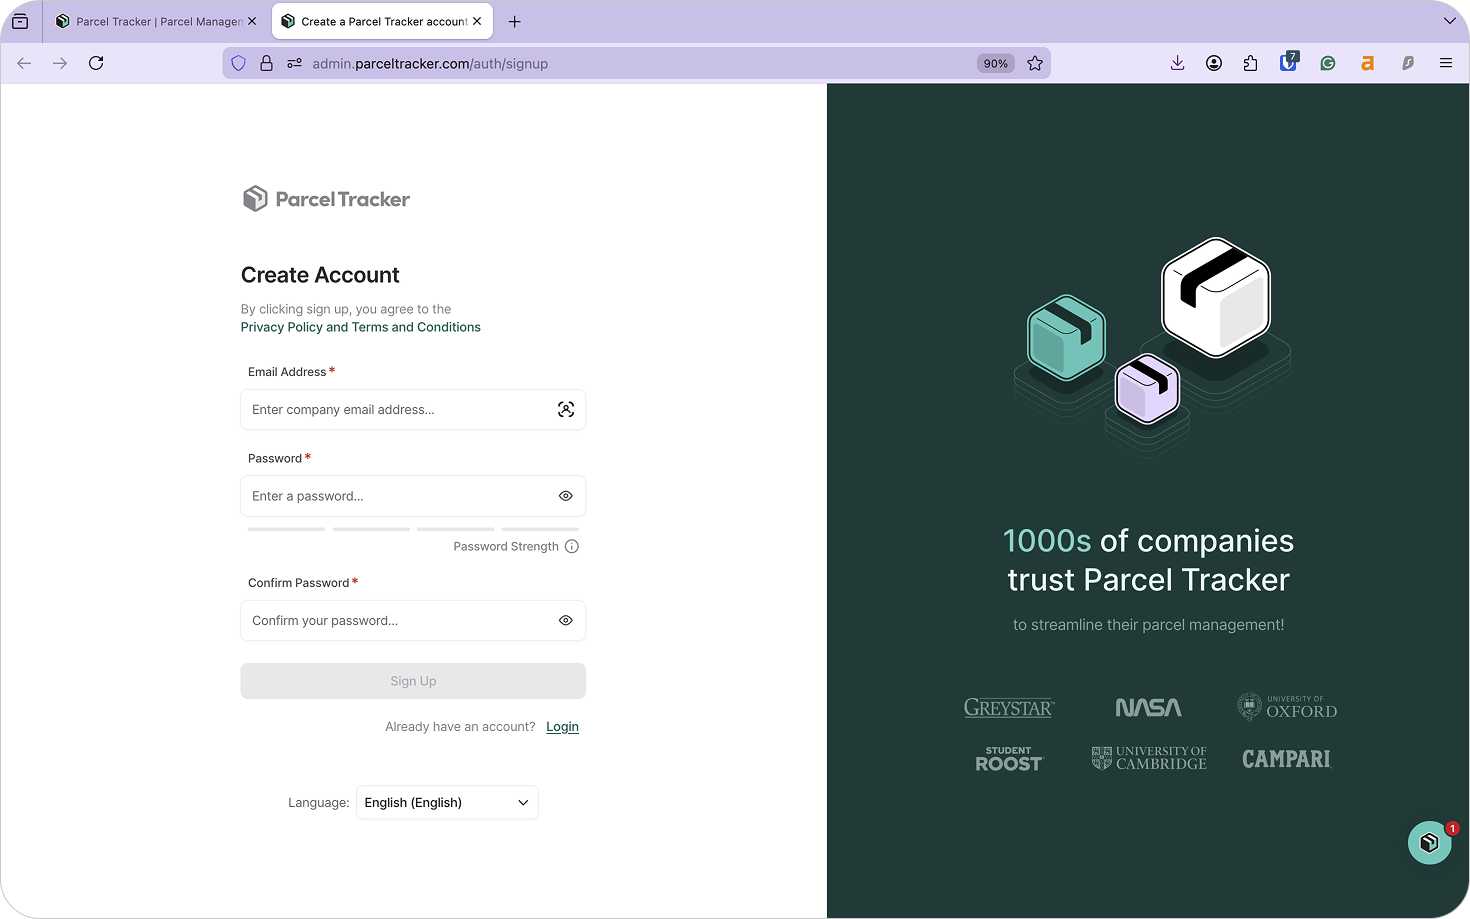
1. Create a Parcel Tracker Account
Go to parceltracker.com and select Sign Up for Free to create your account. Once logged in, open Settings from the lower left-hand corner to add your company logo and address.
Next, navigate to Settings → Features and enable Additional Parcel Details. This feature allows you to:
- Add parcel tags
- Assign storage locations
- Capture a clear photo of the parcel at intake

In high-volume PBSA environments, parcels are often handled by multiple staff members across different shifts. Enabling this feature provides better visibility and consistency, helping teams keep parcels organised and reducing disputes during collection.
2. Upload Your Student Recipient List
Before scanning any parcels, upload your recipient list. For PBSAs, this typically includes student residents, but may also include staff members who receive deliveries on site.
Parcel Tracker uses this list to automatically match parcels to recipients using OCR scanning. It also ensures notifications are sent to the correct student as soon as a parcel is logged. Without a recipient list, parcels may need to be logged manually, resulting in delays, mismatches, or parcels being placed on hold.
A typical PBSA recipient list includes:
- First name
- Last name
- Email address
- Apartment, room, flat, or unit number
To upload your CSV file:
- From the dashboard, select Recipients
- Choose Import List and select the file from your device
- Confirm you have permission to upload the data and select Continue
- Map each column to the correct field and select Continue
- Review the data and select Continue
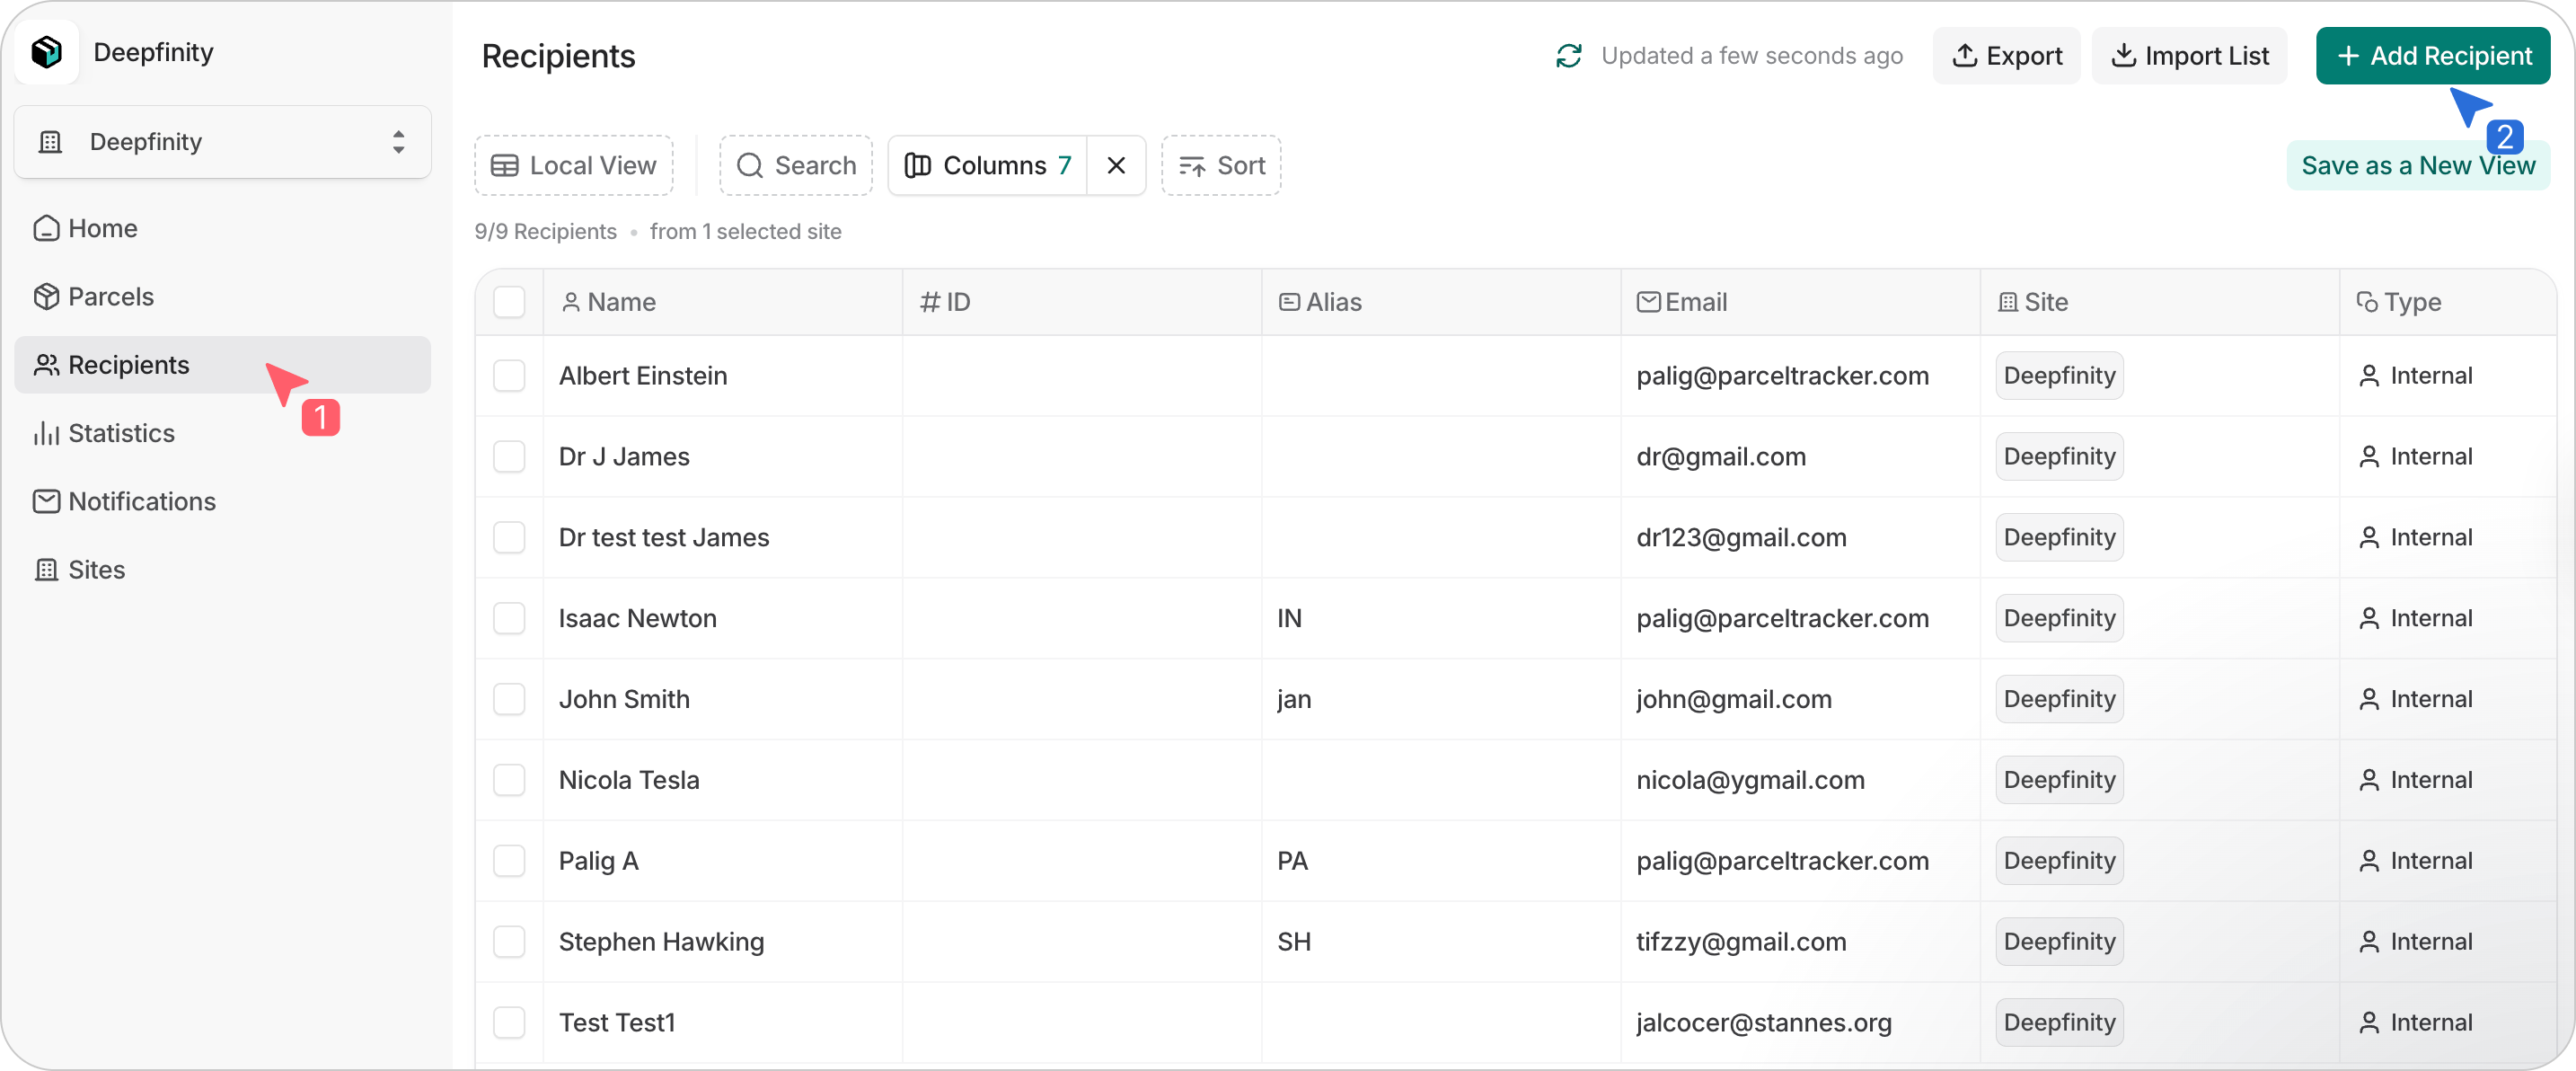
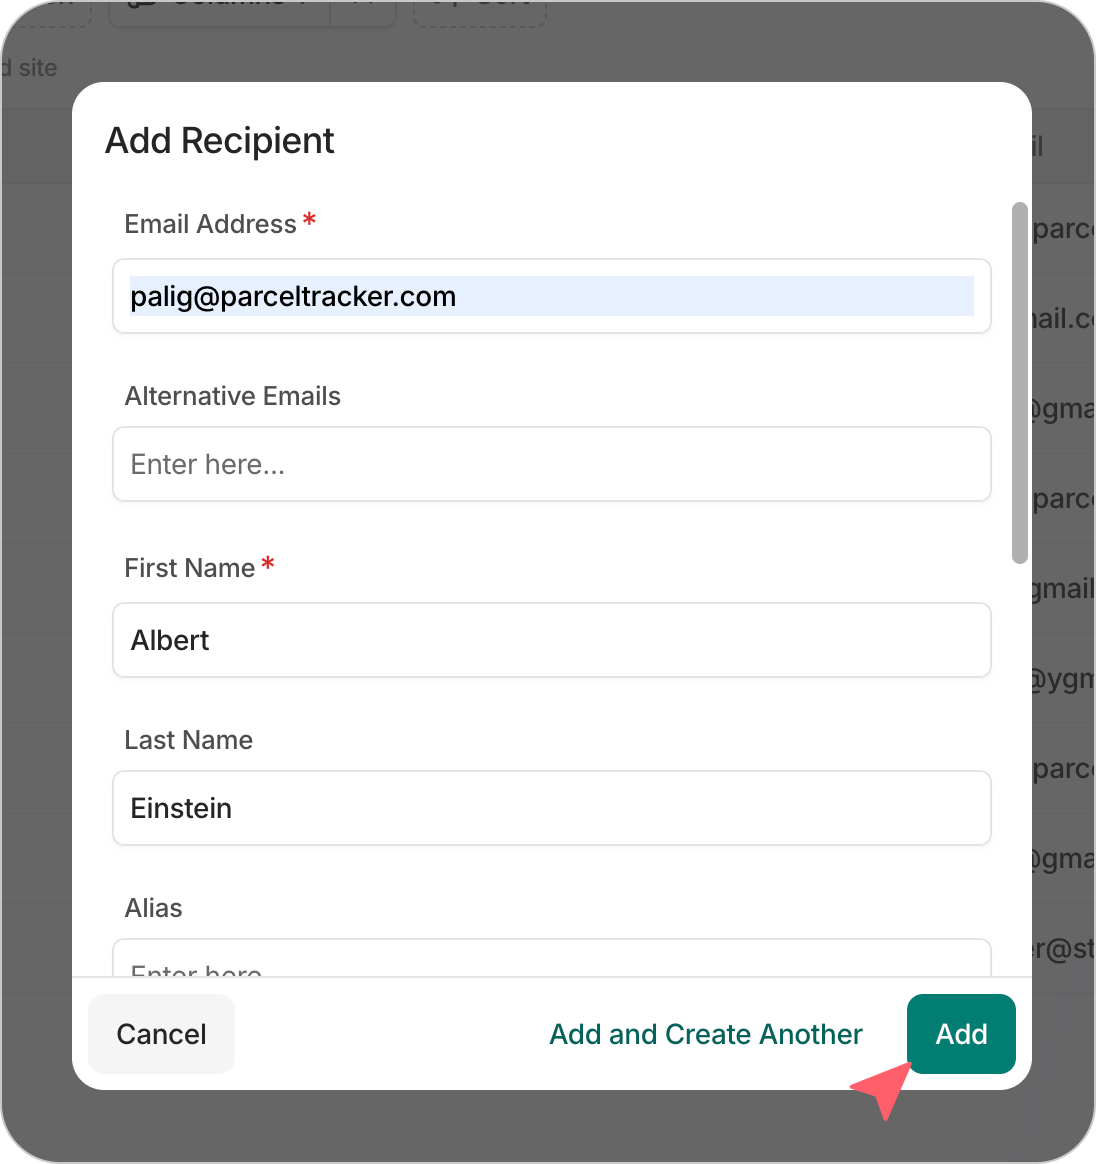
Parcel Tracker will flag any errors or duplicate recipients and will also highlight changes if an updated list is uploaded later. To add recipients individually, select Add Recipient and enter the necessary details.
3. Set Up Scanning Devices for Front Desk or Mailroom Staff
Next, designate the devices your team will use to scan parcels. Parcel Tracker works on both Apple and Android phones or tablets.
For best performance, we recommend:
- iPhone SE or newer
- Android devices with at least 6GB RAM and a 2.8 GHz processor
Buildings may choose to use a dedicated shared device, or allow staff to install Parcel Tracker on their personal phones. If staff are using personal devices, they should be added as Mailroom Users.
To add users, go to Mailroom Users → Invite User, enter their email address, and assign roles based on their responsibilities.
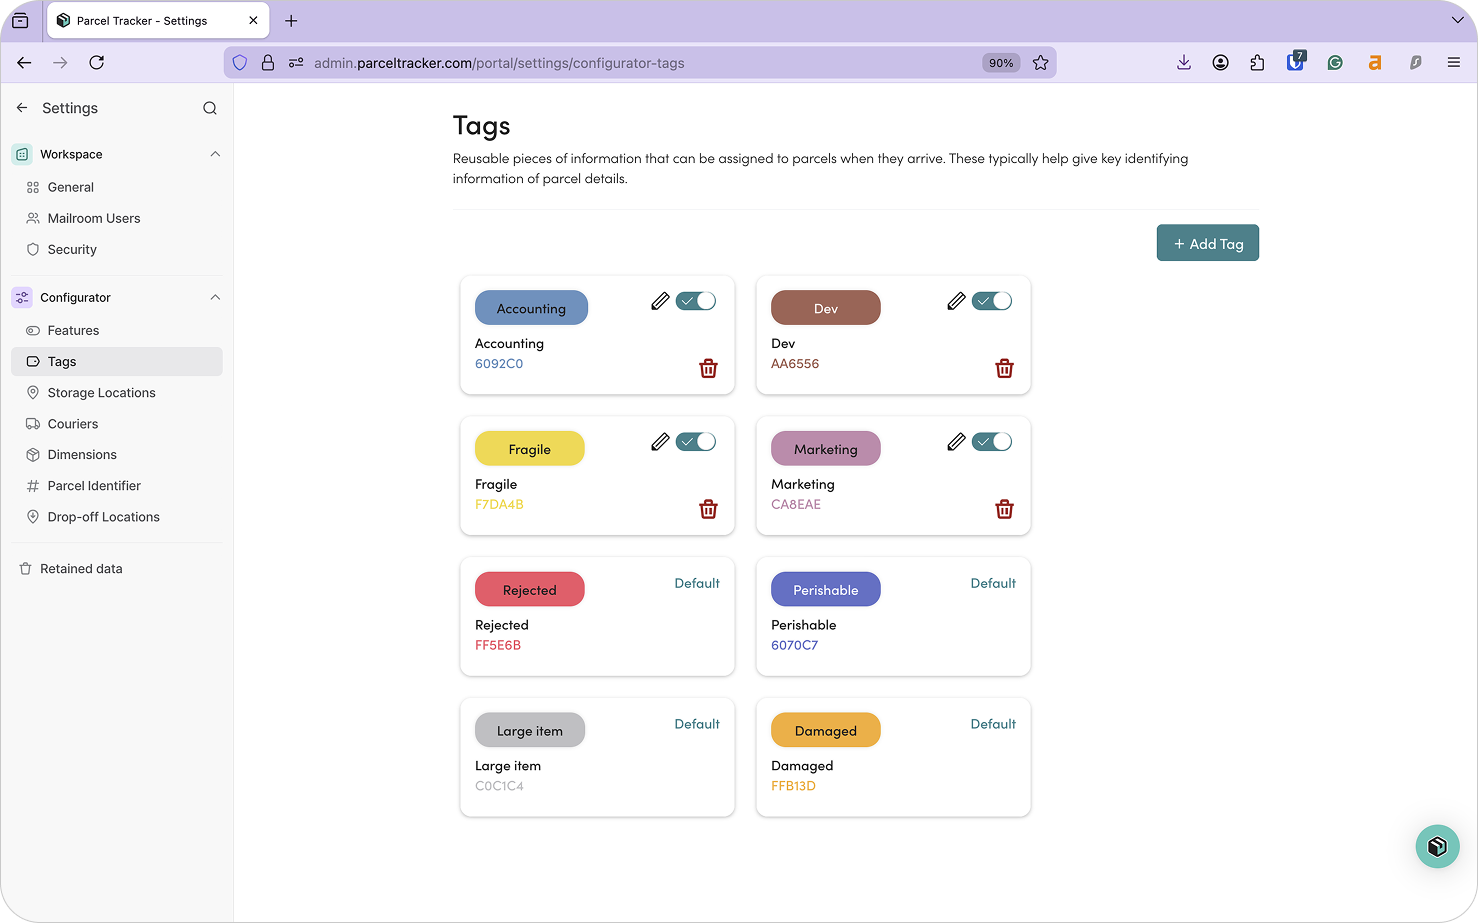
4. Configure Parcel Tags
Tags help staff quickly understand how a parcel should be handled. In PBSAs, it’s best to keep tags simple and intuitive so intake remains fast, even during peak periods.
Common PBSA tags include:
- Fragile
- Perishable
- Damaged
- Oversized
- High Value
- Food Item
Tags are especially useful during move-in week and exam season, when delivery volumes are high and staff need clear visual cues to handle parcels correctly. Go to Settings → Tags and click Add Tags.
5. Configure Student Notifications and Branding
Once parcels are scanned and stored, Parcel Tracker can automatically notify students. This reduces front desk interruptions, encourages timely collection, and prevents overcrowding in package rooms.
Parcel Tracker supports four notification types:
- Delivery: Sent when a parcel is first scanned into the building
- Collection: Confirmation that a parcel has been picked up
- Reminder: Sent automatically if a parcel remains uncollected
- Sign-up: Sent when a new recipient is added to the system
Delivery and Collection notifications are enabled by default. To customize notifications:
- Open the Notifications tab
- Select the + icon to enable a notification template
- Choose Actions → Edit to customize the message
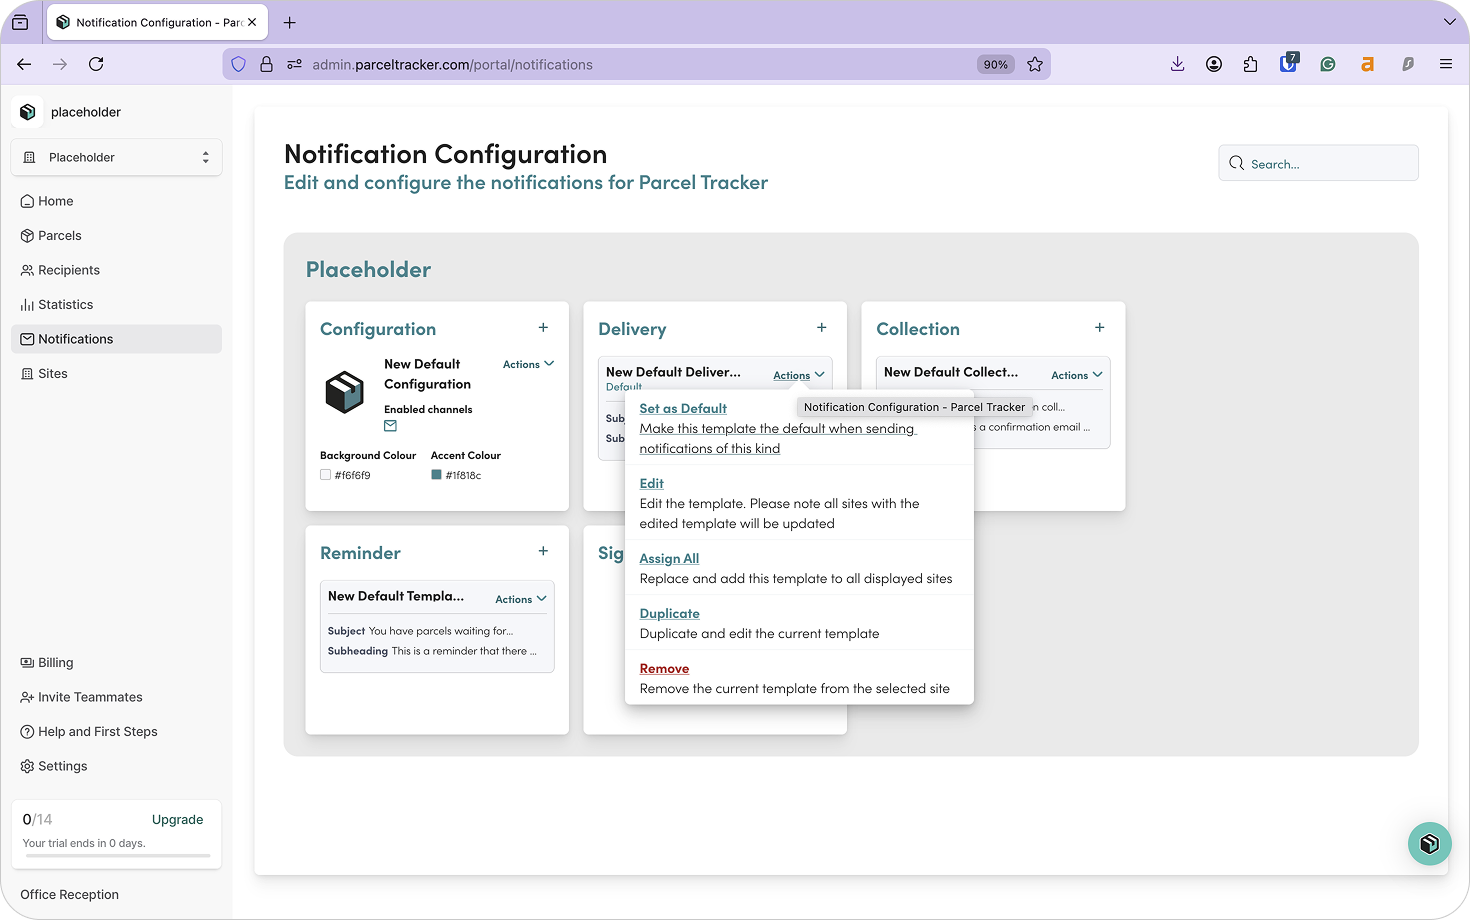
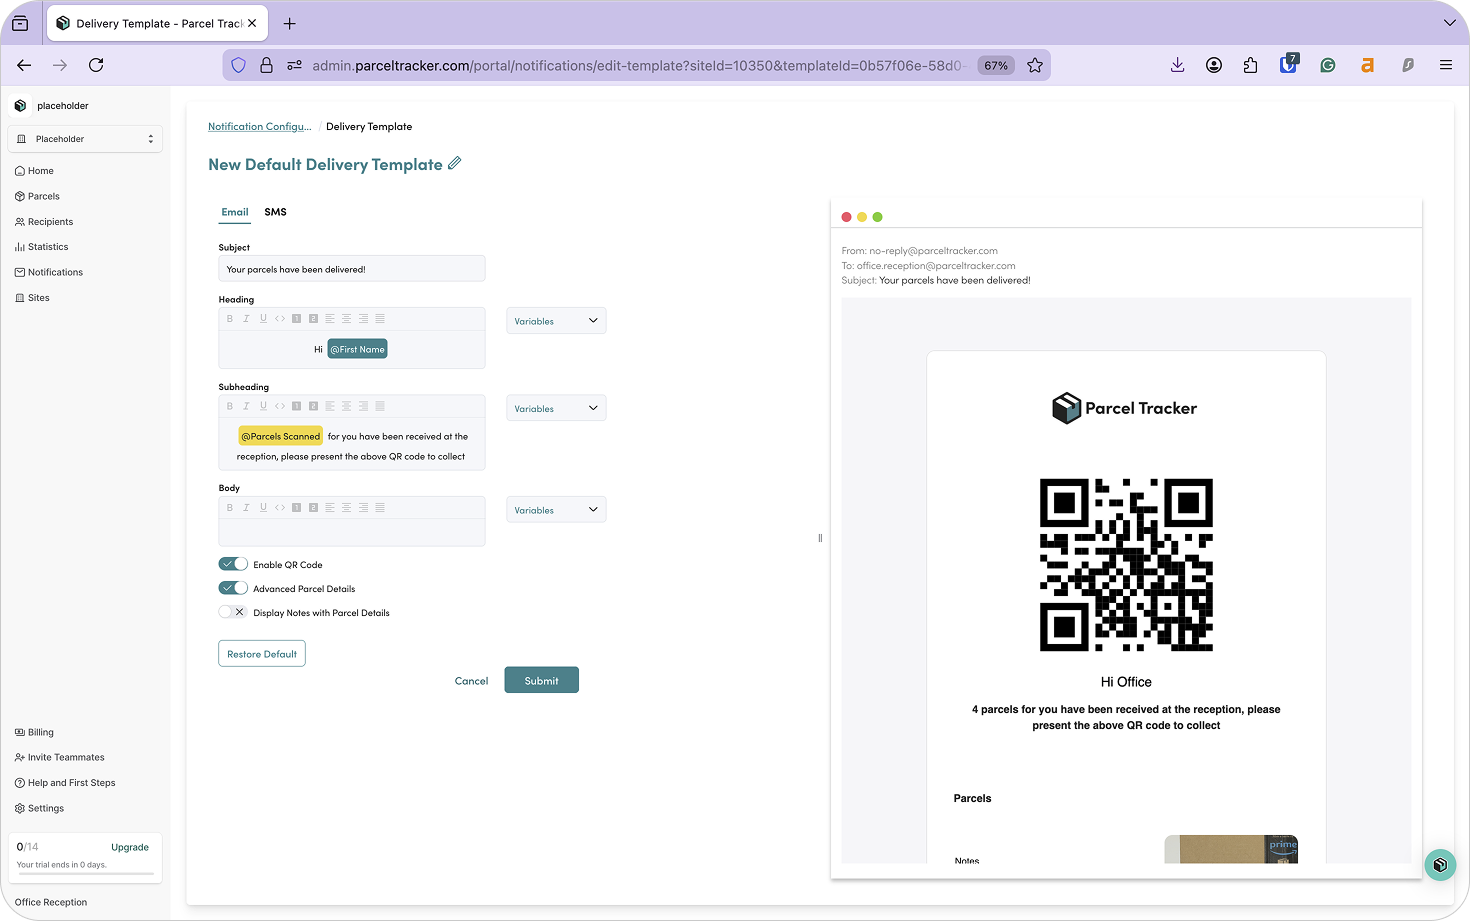
From the preview screen, you can adjust messaging and choose whether to display parcel details such as courier name, delivery time, or notes. Select Submit once changes are complete.
6. Set Up Storage Locations for Your Package Room
PBSA package rooms can fill up quickly, especially during peak delivery periods. To prevent parcels from being misplaced, Parcel Tracker allows you to assign a storage location to each parcel.

Go to Settings → Storage Locations and click Add Location. Since most PBSAs use a single central package room, we recommend creating locations that reflect your physical layout, such as:
- Shelf A – Row 1
- Shelf A – Row 2
- Shelf B – Row 1
- Shelf B – Row 2
Assigning storage locations at scan-in ensures staff always know where parcels are stored and reduces time spent searching during busy collection windows.
7. Download Parcel Tracker for Mobile
Download Parcel Tracker – Mailroom from the iOS App Store or Google Play Store. Once installed, sign in using your account credentials.
You’re now ready to begin scanning parcels.
8. Parcel Sign-In
When a parcel arrives:
- Select Scan Parcels
- Hold the camera over the label
- Press and hold to capture the recipient name and barcode
- Take a wider photo of the parcel
- Assign tags and a storage location
- Select Submit to continue scanning
When finished, select Next, then Check-in to sync parcels to the system.
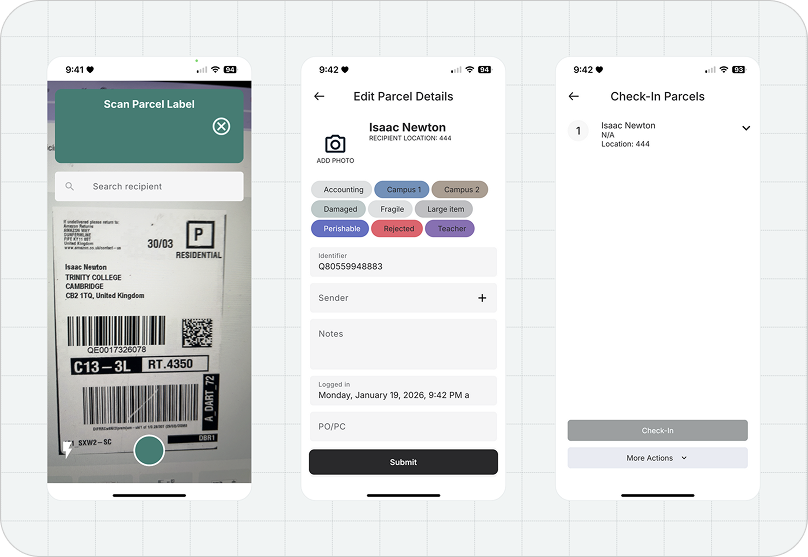
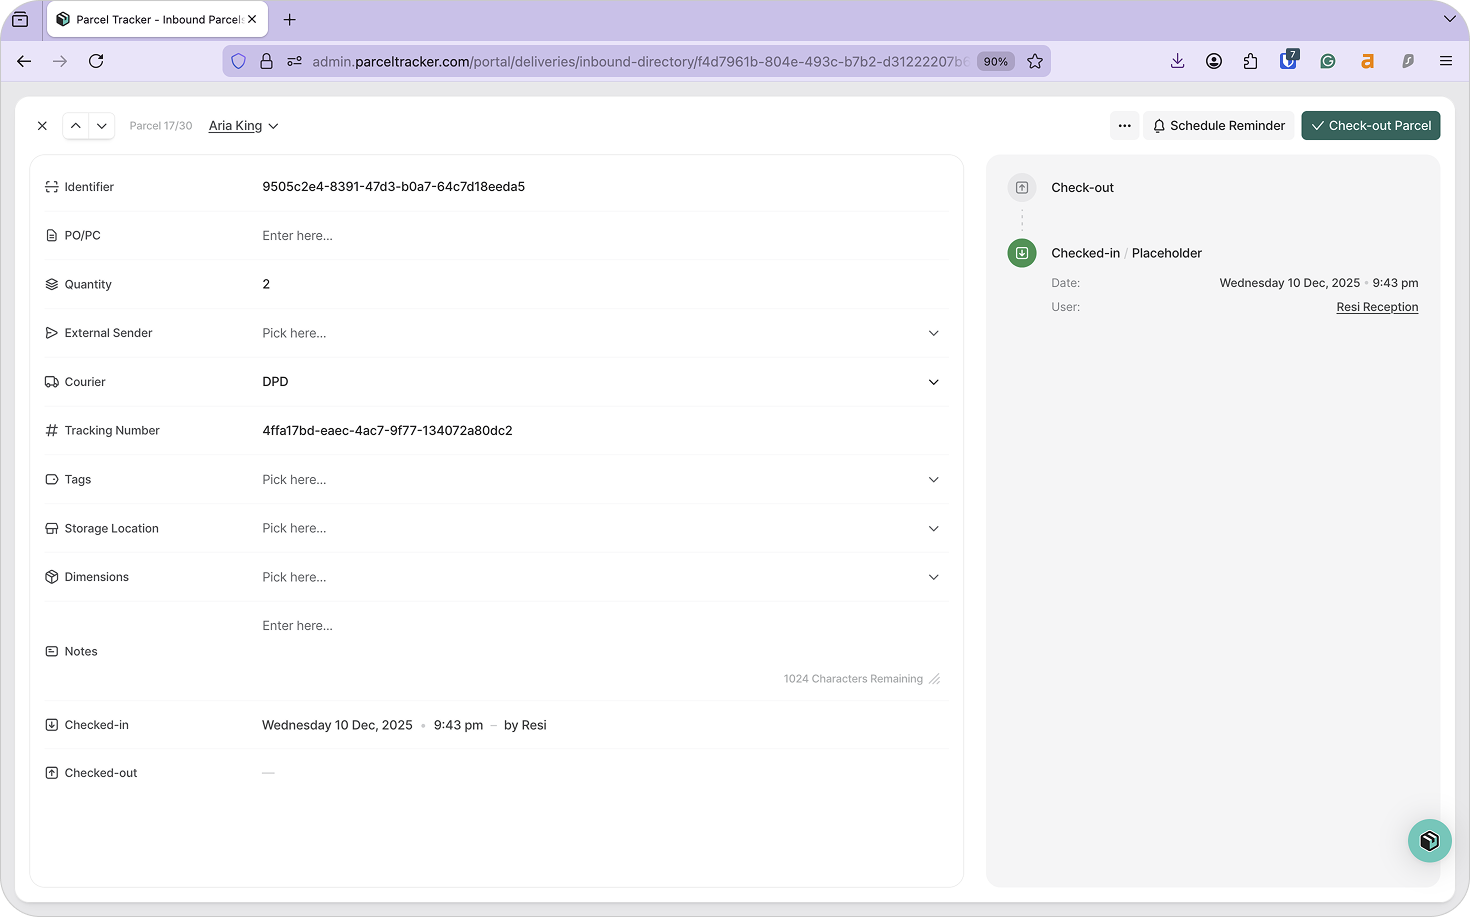
All scanned parcels will appear in the Parcels tab on the web dashboard, where staff can view details by recipient.
9. Parcel Sign-Out
Once a parcel is checked in, the recipient receives a notification email containing a unique QR code.
To check out a parcel:
- Open the Out panel and select Recipient Check-out
- Scan the recipient’s QR code
- Scan the parcel labels
- Select Next, then choose Check out or Recipient e-signature
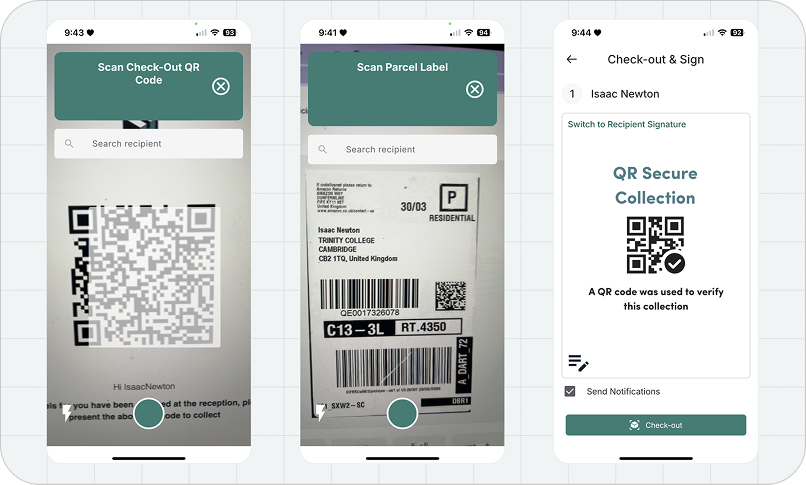
If a student forgets their QR code, parcels can also be signed out from the dashboard:
- Open the Parcels tab
- Select the recipient
- Choose Check out parcel
- Capture the recipient’s e-signature
Tip: Use Reporting to Prepare for Peak Periods
Parcel Tracker’s reporting tools help PBSAs understand delivery patterns over time.
Useful metrics include:
- Peak delivery days and times
- Average pickup time
- Volume spikes during move-in or holidays
These insights help teams plan overflow storage, adjust notification timing, and refine workflows during peak periods.
Welcome to Parcel Tracker
Setting up Parcel Tracker correctly allows PBSAs to move from reactive parcel handling to a structured, predictable process.
Now, your team can manage higher volumes with less stress while delivering a smoother, more reliable experience for students. Sign up today for free.